
Decorative Stucco and Architectural Details in St. George, UT | St. George Elite Stucco
St. George Elite Stucco is a licensed and insured contractor with 15 years of experience providing decorative stucco and architectural details for residential and commercial properties in St. George, Utah. We create shaped stucco trim that projects from the field wall, the plain wall area surrounding the details. The options include accents running across the wall, trim around openings, and projecting features for corners, porches and columns.
The design starts with your choice of profile, the cross-sectional shape of the trim. We cut that profile from EPS shape stock, a light foam shaped to your drawing. Every face then receives a fiberglass mesh wrap set in a 1/16-inch base coat, forming the weather-facing hard shell according to the manufacturer's specification.
Arches and curved openings require a full-size layout before we cut anything. Because the desert sun casts sharp shadows, the main design choice is how far each shape projects from the wall.
We install shaped details throughout Washington County, including Ivins, Hurricane and Santa Clara. Bring us your drawings, and we will explain which profiles the wall can take and provide the cost for each run.
Request a Free Estimate
We're ready to take on your project!
Decorative Stucco Scope: Bands, Quoins, Surrounds, and Column Wraps
Decorative stucco is applied relief, meaning we add the detail to a building elevation instead of building it into the wall. An elevation is one face of the building. Our decorative stucco work covers details applied to that face. Caps and copings on a freestanding wall belong to our block wall work, while ornamental plaster run inside the house belongs to our plastering work.
Bands, Reveals, and Pop-Outs Across a Field Wall
A band is a horizontal strip that projects from the face of the field wall. When the band runs the full width of a house at the floor line, the trade term is a belt course. A reveal creates the opposite effect by recessing a line into the wall, while a pop-out brings an entire wall panel forward.
Bands, reveals and pop-outs can break up a tall, blank elevation and give your eye a horizontal line to rest on. Placement matters as much as the profile because a band under the eave serves a different visual purpose from one at the floor line. When a band turns a corner and stops, we form a return, the short end face where the band turns back to the wall. People usually notice that return first, so it needs to look deliberate.
Window and Door Surrounds, Sills, and Keystones
A surround is shaped trim that frames all four sides of a window or door. The sill sits beneath the opening and has a sloped top. Above the opening, you can add a header, the trim that runs across its width, along with a keystone at the center of an arch.
Openings are often where a plain elevation looks unfinished. A window cut into flat stucco has nothing around it to create depth, while a surround adds both a frame and a shadow. Most of the decorative stucco requests we receive begin with window or door surrounds for that reason. On an already finished wall, we install the surround and work the surrounding finish back in, with that repair included in the same job.
Quoins, Corbels, and Wrapped Columns
Quoins are stepped blocks that define a building corner. A corbel is a bracket shaped to appear as though it supports the weight above. You will usually see corbels beneath an eave, a balcony or a projecting band.
For a column wrap, we build shaped stock around a post or column that is already in place. We wrap the column, while the structure beneath it remains outside our scope. A round column requires separate segments so the profile can follow the curve. On a square column, we form four straight faces and join them with miters, the angled joints where two faces meet. A freestanding masonry wall may also have a pilaster, a column shape flattened against the wall, but that detail belongs to our block wall work.

How We Build Decorative Stucco Shapes with Shape Stock, Mesh, and Base Coat
We build each shaped detail with a lightweight core and a hard outer shell. The shell creates the finished surface you see while protecting the shape beneath it. Where the detail meets the field wall, our stucco installation work includes the metal lath that supports the plaster and the water-resistive barrier behind the lath.
EPS Shape Stock and Why We Wrap It Instead of Using Solid Plaster
Expanded polystyrene (EPS) shape stock is a rigid plastic foam that we cut to the profile you choose. We guide a hot wire along the shape drawn on your elevation, producing a finished piece that a crew can lift and set by hand at height. Making the same projection from solid plaster would add considerable weight and leave it prone to cracking. EPS shape stock provides the profile, and the hard shell protects the foam from exposure.
Because the stock stays soft beneath the coating, shaped trim depends on its outer shell even more than a flat wall does. The risks to that soft stock are part of the maintenance considerations for decorative stucco. Shaped trim is not a fire-rated component, and we do not offer it as one. A fire-resistance rating belongs to a tested wall assembly, never to a piece of trim. Our stucco installation work covers the fire-resistance rating carried by your own walls.
Embedding Fiberglass Mesh in a 1/16-Inch Base Coat
We press fiberglass mesh into the wet base coat so the reinforcement becomes part of the shell. The mesh weighs 4.5 ounces per square yard, which is the common weight for this work. We apply about 1/16 inch of base coat over the mesh and bury it completely so the pattern cannot show through the finished surface. The manufacturer’s shape-fabrication specification, the instructions supplied with the stock, sets the required thickness.
As the shape moves with the wall, the embedded mesh helps keep the shell from cracking. We wrap every face because any exposed edge gives water a path to the foam, including the undersides and cut ends. At each corner or miter, we carry the mesh through the joint rather than stopping two separate pieces at the seam. Your trim then has continuous reinforcement around every turn.
Setting the Shape So Water Runs Off
A projecting shape adds a horizontal surface to a vertical wall, giving water a place to collect. We prevent that by forming a wash on the top face, with enough slope to direct water away from the wall. Beneath the front edge, we also cut a drip kerf. The groove causes water to fall clear of the trim instead of following the underside back toward the wall.
Where the shape meets the wall, we seal the joint to keep water from getting behind the trim. We also place the detail above the ground and beyond sprinkler throw. Water that sits on a shape can streak the band and stain the wall below. The wash, drip kerf and sealed joint determine whether your trim still looks right in five years.
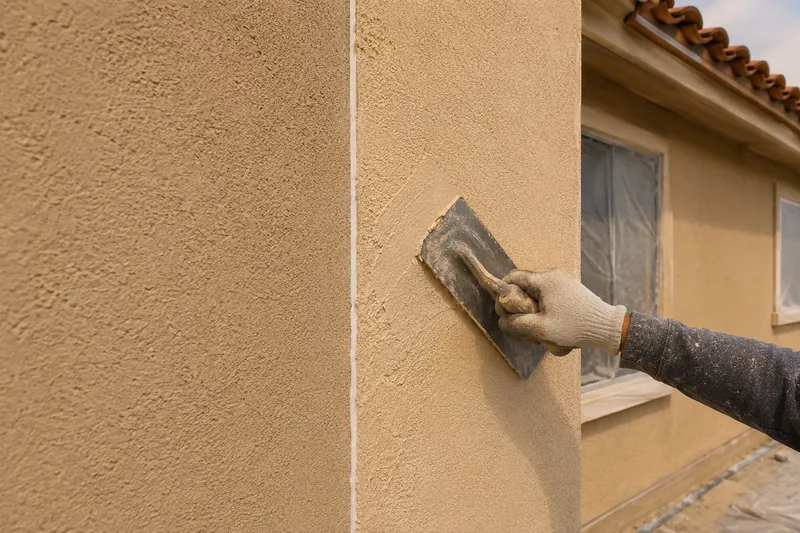
Laying Out an Arch or Curved Opening at Full Size
When your decorative stucco design includes arches or curved openings, the full-size layout must establish a curve that closes cleanly. The radius is the one dimension that decides whether the finished shape comes together as intended, so we establish it before cutting any stock.
Drawing the Full-Size Layout Before Cutting
We draw the arch at its actual size, mark the radius from one fixed point and cut the template from that drawing before any stock is cut. The measurements come directly from your opening on the building instead of being scaled from the plan. A built opening and a drawn opening rarely match to the eighth of an inch.
With the wrong radius, the segments close into a flat spot or create a kink at the crown. You can pick out a bad curve from the street long before you notice anything else on the wall. To catch that problem early, we cut each segment against the template and hold the pieces dry on the opening to check the fit before setting them.
Using One Profile Across the Entire Elevation
When a profile repeats, every copy needs to match. We cut one template for each profile and use it throughout the elevation instead of measuring every piece separately with a tape. The sixth window head then matches the first. With only one template to verify, we can catch an error at the reference point before it ever reaches the wall.
For a long band, we establish one straight line across the wall instead of setting the pieces to each opening in turn. We also plan the joints away from the middle of a run and away from openings. A run that drifts by a quarter inch across an elevation will look wrong even when no single piece is wrong, and correcting that drift becomes expensive once the detail is in place.
Choosing Projection, Relief, and the Shadow a Detail Casts
We use relief to describe how far the trim stands out from the wall. In decorative stucco, that depth is a design choice rather than a default that comes with the profile. Set the same profile at two different depths and you create two different elevations, so the relief needs to be chosen deliberately.
Deciding How Far a Band Stands Off the Wall
The depth of the shape determines its shadow line, and the shadow is often what people notice most from the street. St. George gets around 255 sunny days a year, giving those shadows a sharp edge through most of the year. A profile that looks subtle in a cloudy climate can appear much more pronounced here.
In flat light, a shallow detail can almost disappear, while a deep one can look heavy. One inch of relief against three inches can make the difference between a simple line and a substantial ledge. We show the projection as a dimension on the drawing instead of leaving that decision until the crew is on site.
Carrying the Finish Across the Shape Instead of Stopping at the Edge
We carry the finish coat from the field wall onto the shape so both have the same texture and color and appear as one continuous surface. Cutting the finish around the shape leaves a seam at the edge of every piece, making the trim look as though it was added later.
The finish also continues over the shape perimeter. You see one wall with detail built into it instead of a wall with pieces stuck onto it. Our stucco resurfacing and recoating work covers the texture and color you choose, while painting or coating a shape later belongs to our stucco painting and coatings work.
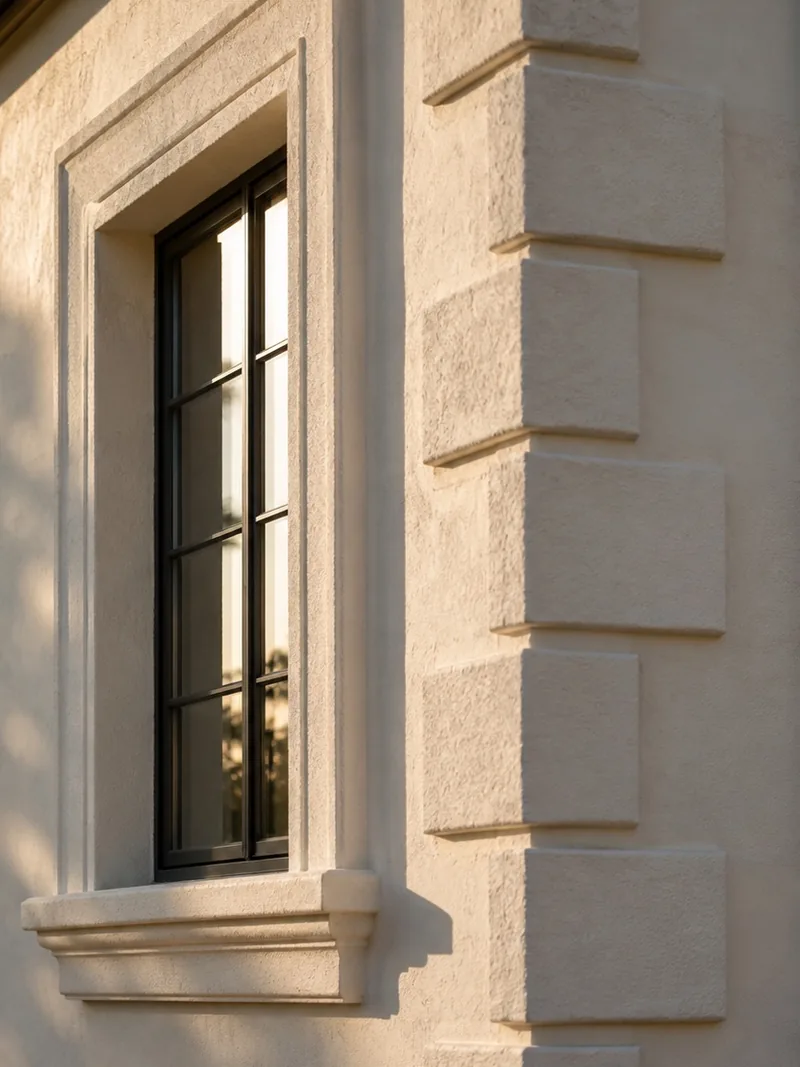
Why Choose St. George Elite Stucco for Decorative Stucco
People notice shaped stucco details from the street, so we settle the design on paper before we mix material. Once we have your elevation, St. George Elite Stucco reviews the profile with you, including its depth and where it will run. The detail built on your wall then matches the design you approved.
Approve the Profile Before We Cut Anything
Before cutting any stock, we show you the profile at its finished size with the projection dimension marked on the same drawing. We use that drawing to cut one template for the entire elevation, which keeps the profile around every window consistent with the one you approved. Any change in depth happens on the drawing rather than from the scaffold. You approve the profiles on your elevation separately, whether you selected them from a catalog or had them drawn specifically for the wall.
What You Can Verify Before the First Shape Goes Up
Decorative trim brings a crew onto your wall and often requires a lift, so you should have the credential paperwork before work begins. Before we work on your wall, you can verify our license and insurance coverage. We carry general liability and workers' compensation. Certificates are available before work starts, and our license number goes on every written estimate. Call (435) 236-2699 or use our quote form to schedule a free on-site estimate.
What Adds Cost to Shaped Detail
We price shaped detail by the profile and linear foot, rather than by the square foot of wall. A whole-wall rate therefore cannot show what the shaped work on your elevation will cost. We build the estimate around the work involved, including these factors.
- We measure the linear feet of each profile, counting every run separately.
- Each different profile on the elevation requires its own setup and template.
- We hand-fit every corner, return, and miter.
- For arches and curves, we lay out each radius at full size.
- A deeper profile has more faces to cover with the same wrap, so profile depth affects the price.
- Story height and access matter because a belt course requires the same scaffolding whether the run is short or long.
- We also account for whether the detail goes on a new wall or a finished wall. On an existing finish, we work the surrounding surface back into the new detail.
When comparing materials, cast stone and solid masonry can give you the same relief at far more weight, although neither has a soft core to protect. For an on-site inspection, call (435) 236-2699 or use our quote form.
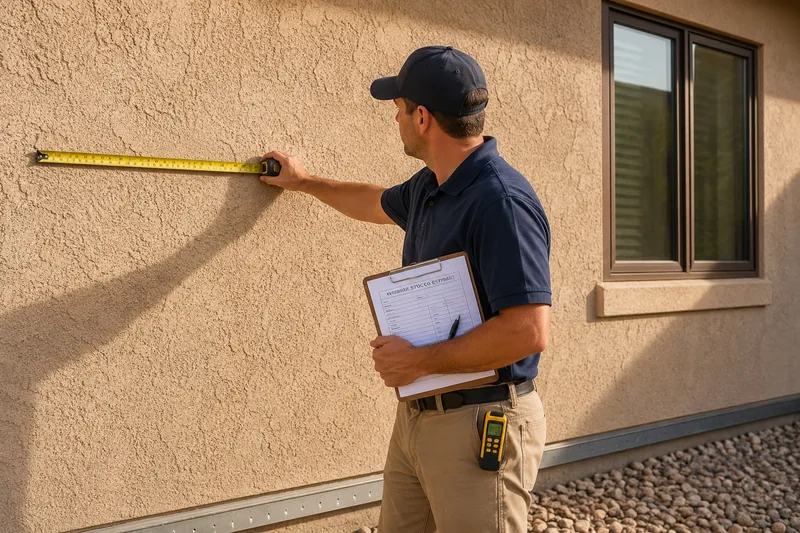
From Layout and Cutting to Wrap and Finish
Once your drawing arrives, St. George Elite Stucco takes the job through six steps, from walking the wall to turning the last elevation over to you. Every step ends with something you can see or sign, and the first two steps are free.
-
Bring the Elevation and Walk the Wall.
You can send us an elevation drawing, or we will measure the wall faces on site if you do not have one. Together, we walk the wall and mark where each detail will run, what it will frame, and what the wall can take.
-
Choose the Profile and Review It at Full Size.
You choose either a catalog profile or a profile cut to your drawing. You approve its projection before fabrication begins.
-
Review the Written Estimate and Any Community Samples.
Your estimate lists the profiles and individual runs separately, making it possible to compare our price with another bid line by line. Where a community reviews exterior changes, we supply product color and texture samples for the submittal. The architectural review board sees that complete package.
-
Cut the Shape Stock.
We cut every shape to the approved template, including straight runs and curved segments. Using the same reference for both keeps the curve and the band aligned with the design you approved.
-
Set the Shapes and Apply the Wrap.
We set the shapes to a line, close each joint, and wrap every face with fiberglass mesh and base coat.
-
Apply the Finish Coat and Walk the Elevation.
We apply the finish coat across the shape and the wall in one pass, leaving them as one continuous surface. Then we walk the elevation with you and clear anything that remains on the punch list. Once the run is complete, we remove the scaffolding and take away the debris.
To get a written price for each profile and run, call (435) 236-2699 or send your drawing through our quote form.
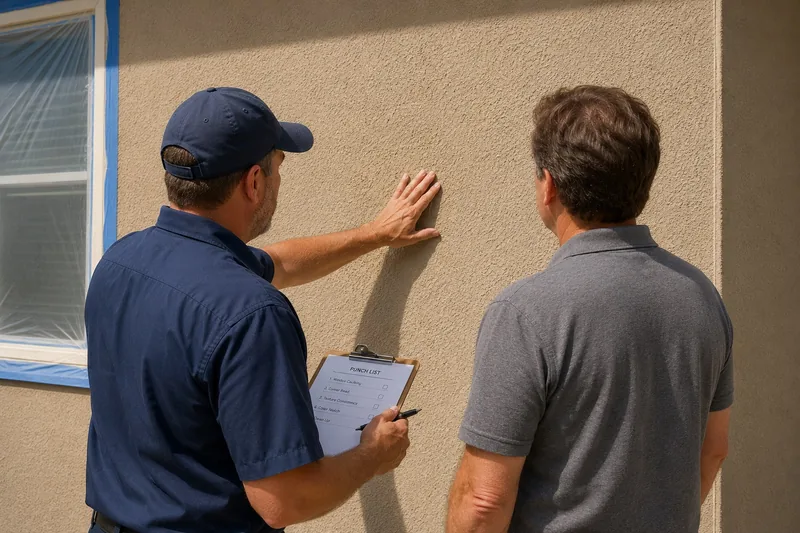
Maintaining Decorative Stucco Trim in Desert Sun
On a shaped detail, the hard outer shell protects the softer core underneath. A chip through that coating is therefore a bigger problem than the same chip on flat stucco. Shaped trim in Southern Utah also faces a particular kind of damage from birds and pests. You can catch most other problems during a simple inspection once a year.
Woodpeckers, Rodents, and Soft Stock Under the Coating
Woodpeckers can drill through a thin shell and reach the soft shape stock behind it. Once they open a cavity, rodents, wasps, and bees can move in. You will usually find this damage on the undersides of bands, on corbels, and along the top of a column wrap. Shaded faces tend to take more damage than faces baked by the sun.
To repair the area, we cut the damaged coating back until we reach sound material, fill the void, and carry mesh through the patch. We then re-coat the repair and blend it into the surrounding finish. Expect it to recur at the same spot while birds are working that wall, which makes it a maintenance item. We name no deterrent product and promise none.
Checking the Washes, Top Edges, and Sealant Joints
Once a year after the hot months, inspect the top faces and make sure the washes still shed water instead of holding it along with dust. The sealant joint where the trim meets the wall is a consumable part that will eventually fail. Hairline cracks also tend to appear first at miters and joints, so check those areas closely.
Irrigation overspray can stain low trim, but you can usually prevent it by moving any sprinkler head aimed at a band. Cracking in the field wall itself falls under our stucco repair work. When the wall continues to fail, the work falls under our stucco remediation service.

Mediterranean and Spanish Colonial Detail in Decorative Stucco
Mediterranean and Spanish Colonial describe a design vocabulary, with a set of shapes and decisions about which ones belong on the house and where they should go. The name alone does not create the style.
The Elements the Style Actually Uses
Most people recognize the handful of shapes used in these styles, even when they do not know the trade names. That vocabulary includes the following elements.
- Arched openings, including arcades that repeat the same arch along a run.
- Heavy window surrounds, with a sill below and a header above.
- Quoined corners.
- Corbels placed under eaves, balconies, and projecting bands.
- Belt courses that divide an upper floor from a lower one.
- Parapet caps along the top of a wall, along with recessed niches.
- Wrapped columns at a porch or an entry.
The proportions of your elevation determine which of these elements it can take, more than the style name you choose.
Creating a Period Look on an Existing House
When you want a period look, we apply new detail in that style and choose each element to suit the house you have. Historic preservation and period-accurate restoration on a historic building belong to a separate discipline with its own credentials, and we do not offer that work.
We choose the profile in relation to the proportions of your house and the houses beside it. A detail drawn for a much larger building looks wrong when it is reduced to house scale. A homeowners association that reviews exterior work may also limit what your elevation can take.

Decorative Stucco Across Washington County
Washington County’s strong sunlight gives shaped details plenty of changing light to work with. The direction your wall faces affects how the same profile looks throughout the day. A north elevation stays in softer light for most of the day, so the depth of the profile matters more there than on a wall crossed by direct sun. We settle that question before you choose a profile because one band can look bold on one side of the house and nearly disappear on another.
Where St. George Elite Stucco Adds Architectural Detail
St. George Elite Stucco serves communities throughout Washington County, including the connected cities around St. George and smaller settlements near the county's valleys and mountain approaches.
- St. George, Washington, Santa Clara, Ivins, Hurricane, La Verkin, Toquerville, and Leeds
- Winchester Hills, Diamond Valley, Dammeron Valley, Veyo, Brookside, Central, and Pine Valley
- Gunlock, Shivwits, Virgin, and Apple Valley

Architectural Detail Questions
Homeowners tend to ask the same questions about shaped details, often before they have settled on a profile. The answers usually come down to how we build, lay out, finish, and maintain the trim.
What is foam shape stock, and why is it wrapped instead of plastered solid?
For your detail, the foam shape stock follows the profile specified on the drawing. We then cover it with mesh and base coat, creating the outer layer that takes the weather. Shape stock arrives in straight lengths that we cut and join on the wall rather than as one continuous casting. Using wrapped foam avoids that problem while allowing the depth to come from your drawing instead of limiting you to a profile off the shelf.
Why can a curve not be worked out on a scaled drawing?
For an arch, we strike the radius at full size and make the template directly from that layout. A smaller drawing cannot show us whether all the individual segments will close properly when they meet. We keep the full-size layout after cutting, then verify the installed arch's spring points, centerline, rise, and symmetry against the approved opening dimensions.
What keeps a band or a surround from looking like it was added later?
After we set a band or surround, we finish it at the same time as the wall instead of treating it as a separate piece. The finish covers and closes the joint along the edge, while the depth of the detail is sized to suit your house. The installation sequence does more to make the addition look original than the particular profile you choose.
What maintenance does shaped trim need in St. George?
Look over the shaped trim once a year after the heat has passed. Check the washes, sealant joints, and miters, along with any hole that has opened in the coating. A hole should be closed promptly because the coating protects the shape stock underneath. Left open, even a small break can develop into a cavity.
Can I choose a stock profile, or does every shape have to be cut to my drawing?
You can choose a stock profile from a catalog or have us cut the stock to match a profile drawn for your elevation. For a custom profile, we first make a dedicated template for the shape. Because that setup is specific to your design, the estimate shows it as a separate item.
Does foam trim mean my house has synthetic stucco?
No. Synthetic stucco usually refers to a wall assembly built out over foam insulation. Adding shaped trim to a cement stucco wall does not turn it into synthetic stucco, regardless of what the trim is made from. We identify the wall type by the assembly behind the finish rather than the trim attached to its face. Our commercial stucco work also covers synthetic wall systems.
Bring Us Your Elevation Drawing
Send us your elevation drawing, or walk the wall with us so we can read the details in place. We will prepare an estimate that names every profile, gives the length of each run, and prices each one before you commit to the work. You receive the estimate in writing, and the visit is free. Call (435) 236-2699 or request a free estimate through our quote form.