
Stone Veneer in St. George, UT | St. George Elite Stucco
St. George Elite Stucco has installed stone veneer on residential and commercial properties in St. George, Utah for 15 years. We are a licensed and insured stucco contractor, and we offer stone setting as a separate trade alongside our plaster work. We install this stone cladding over a supporting wall, whether you want an accent band across the front of a house or stone covering a full elevation, one face of the building. Our work also includes adding a stone face to block walls and covering outdoor living features such as fireplace surrounds, BBQ islands and patio columns.
Your two main material choices are natural stone veneer, quarried and sawn thin, and manufactured stone cast from molds. Depending on the stone and its profile, either kind ranges from about three-quarters of an inch to a couple of inches. For every manufactured product, we follow its maker's installation instructions. A framed-wall installation also includes a drainage plane for water, metal lath for grip and a scratch coat that forms the setting base.
The profile you choose shapes the finished look and affects how long the stone takes to fit. Common options include ledgestone, drystack and split face. Where stone meets stucco, we finish the shared edge so both claddings have a clean ending.
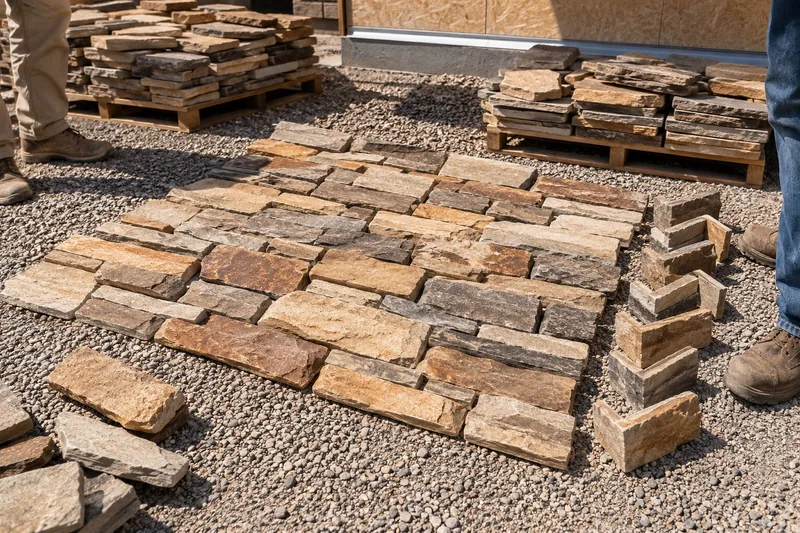
We set stone throughout Washington County, including St. George, Santa Clara, Ivins and Hurricane. Before mixing any mortar, we measure the elevation, count the corners and arrange the stone on the ground. You approve that dry-lay arrangement before any stone reaches the house.
Request a Free Estimate
We're ready to take on your project!
Stone Veneer on Homes, Walls, and Outdoor Living
When stone veneer serves as siding, the surface behind it matters just as much as the stone you choose. A framed house wall, a freestanding block wall and a BBQ island can all receive the same stone cladding, but they do not require the same preparation. We prepare each surface for the material underneath while keeping the finished stone consistent on top.
Accent Stone and Full-Coverage Elevations
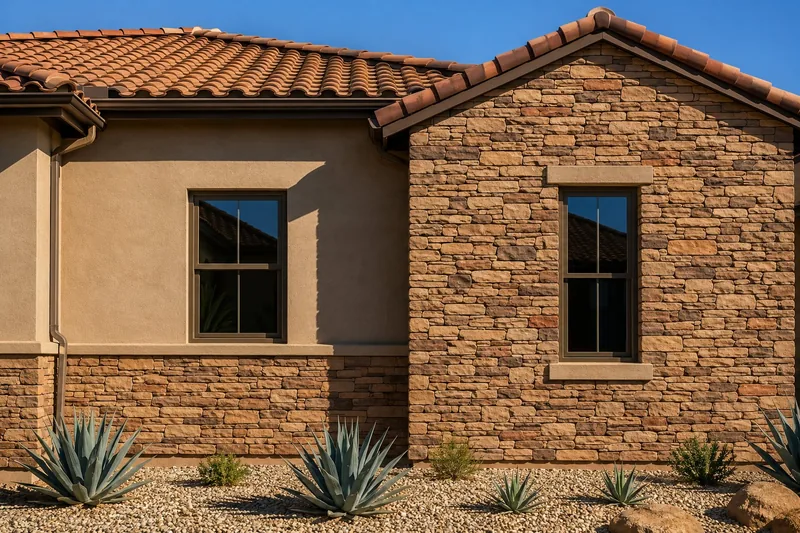
Accent stone cladding covers one part of an elevation while plaster remains on the rest. Common layouts include a wainscot, column and pier wraps, an entry surround, a gable field and a chimney chase. A wainscot runs along the bottom of the wall and ends at a water table, the horizontal break where the stone stops. For a full-coverage elevation, we carry the stone across the wall and around its openings, replacing the plaster rather than using stone only as trim.
Before we work out the technical details, you need to decide where the stone should stop as part of the house’s design. The stop line should follow the shape of the building rather than a square-foot measurement. It usually ends at an inside corner, a change of plane or a window line instead of stopping midway across an open wall. Accent areas also have more corners and edges per square foot than full elevations, so a small area of stone does not automatically make a small job.
A Stone Face on a Block Wall
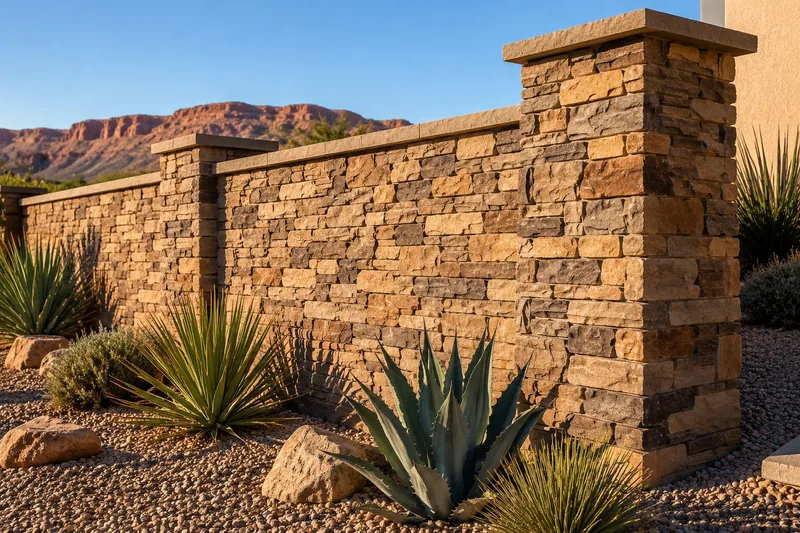
A freestanding block wall has two faces, along with a return end at each stop. Each return is the short end that closes off the wall. Once both faces and the returns are counted, the wall takes stone veneer over roughly double the area its length might suggest. Pilasters, the thickened piers built into the wall, and gate columns draw much of the attention. Each one also has four outside corners of its own.
The cap at the top has an important job as well. When it projects beyond the face and drips clear, water falls away from the wall. A flush cap allows water to run down and enter the top joint instead.
Whether we can bond stone cladding directly to the block with setting mortar depends on what already covers its face. Building the block wall or plastering it belongs to our block wall work rather than this stone veneer work. We do not design walls, set height limits or provide engineering. Our part begins after the wall has been built and signed off.
Fireplace Surrounds, BBQ Islands, and Patio Columns
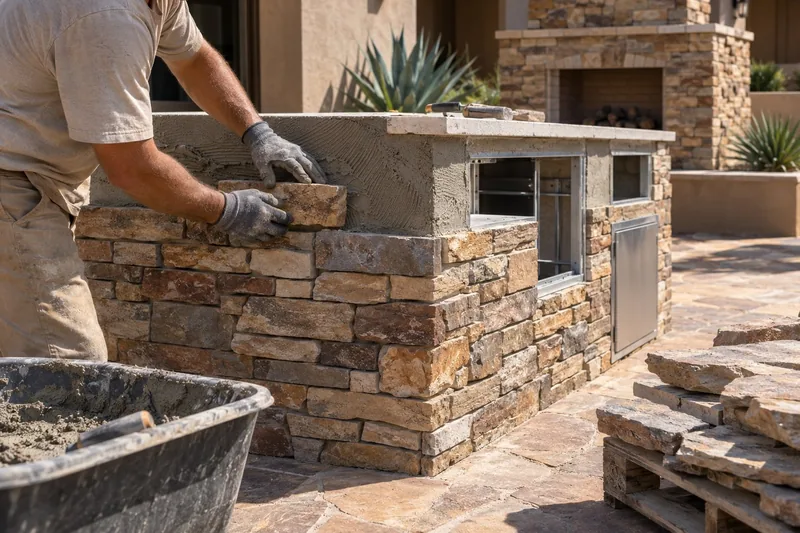
The same stone veneer work can finish outdoor living features as well as the house itself. We face fireplace surrounds and the chases above them, the boxed structures that hide the flues. Other applications include BBQ islands, patio and pergola columns, seat walls, planter faces and address monuments. An interior fireplace face involves the same work on the other side of the wall.
We do not build the firebox or run the gas to it because those parts of the project require an appliance installer and a gas fitter, and we will say so on the walkthrough. We install the stone after that work is complete and signed off.
A BBQ island usually needs stone on three or four sides, along with its returns. Before we set the first course, we lay out the cut-outs for a grill, an access door or an outlet so each opening is in the right place.
Natural and Manufactured Stone, Plus the Wall Behind Them
Every adhered stone job, where thin pieces are bonded to the wall with mortar rather than supported by masonry ties, starts with two questions. First, you choose the stone by viewing samples in daylight against your own wall. Then we determine what will support the stone by opening or cleaning the wall and checking the surface underneath.
Natural Stone and Manufactured Stone, Side by Side
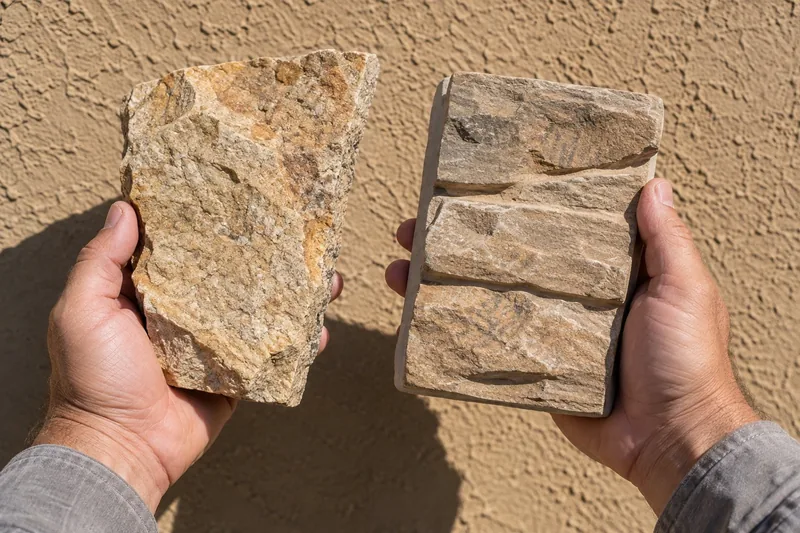
Natural stone veneer is quarried stone sawn to a thin face, usually about an inch. Its color runs through the entire piece rather than sitting only on the surface, so a chipped edge reveals more of the same stone. No two pallets match exactly, and many people choose natural stone because they want that variation.
Manufactured stone, also sold as cultured stone or faux stone, is cast in molds taken from real stone. Manufacturers color it with iron oxide pigment worked into the mix and applied to the face. Because the pieces come from a limited set of molds, you will see the face shapes repeat across the wall. The units are also lighter to handle and less burdensome to freight.
You can quickly tell the two materials apart by turning over a piece. Natural veneer has a sawn, gritty back, while a cast unit has a flat, molded back.
What Goes Behind Adhered Stone on a Framed Wall
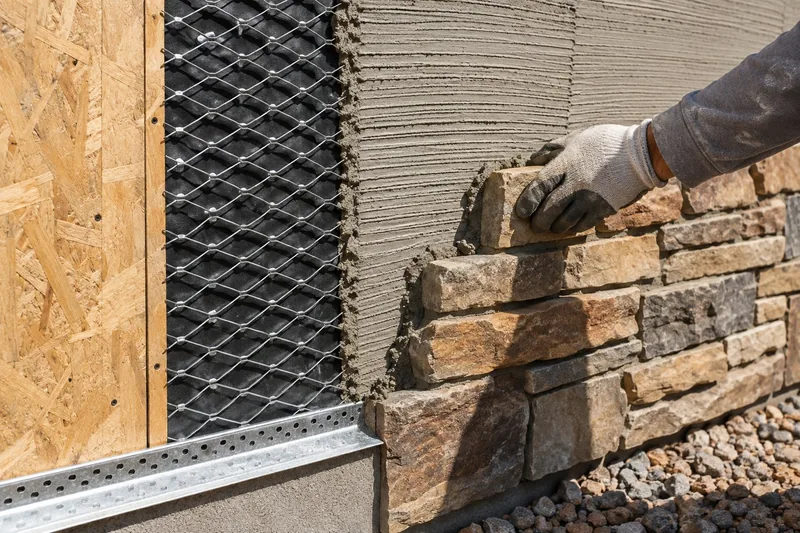
Adhered stone veneer needs several layers between the framing and the finished stone, including a water-resistive barrier, metal lath and a scratch coat. Over the wood panels that sheathe a framed wall, we install two independent barrier layers: the inner layer forms the drainage plane, while the outer layer acts as a sacrificial bond break that keeps the scratch coat from bonding to or telegraphing through the inner barrier. Every layer laps downward, allowing water that passes through the stone to drain back out instead of soaking into the framing.
Metal lath is the mesh that gives the mortar something to grip. We fasten it through the sheathing and into the framing rather than relying on the sheathing alone. Over the lath, we apply the scratch coat, the cement layer that supports the stone. Setting mortar then goes onto the back of each piece to bond it to that prepared surface.
Water eventually gets behind any stone cladding. The stone face sheds most of it, while the layers behind the stone manage the rest, so we build the wall to drain rather than trying to seal it completely. At the bottom of the wall, we keep the stone at least 4 inches above earth, 2 inches above paved areas and half an inch above walking surfaces, measured from your final grade or finished surface.
When these same layers go behind a plaster wall, they are part of our stucco installation work. Specifying them for a house that is still being built falls under our new construction work.
Bonding to Block, Concrete, and an Existing Stucco Wall
We can apply setting mortar directly to clean, unpainted block. Concrete can also take mortar directly when its face has enough texture for the mix to key into. Before applying any mortar, we wash and dampen the wall so dry masonry does not draw water out of the mix before it sets.
Paint and sealers change how we prepare the surface because the stone bond is only as secure as the paint holding to the wall. On painted or sealed walls, we install lath and a scratch coat instead. The stone siding is then supported by the framing or masonry underneath rather than by the coating.
Even clean concrete needs a different approach when its face is slick and dense. The release agent used on the forms can interfere with the bond without leaving a visible mark, so we install lath and a scratch coat on that surface as well.
We can install stone veneer over an existing stucco wall when the plaster remains sound and firmly attached. To check it, we tap across the surface and listen for hollow spots that show where the plaster has come loose. We also confirm that the existing plaster is fixed to the framing. When a wall drums under tapping, shows cracks or is still moving, we address the underlying problem before adding stone. Determining why that wall is failing is part of our remediation work.
Profiles, Corners, and Blending a Stone Veneer Wall
When you choose a stone profile, you are choosing both the shape of the pieces and how they course, or line up in rows. That choice determines the mortar joint you will see and how long it takes us to fit the wall, so it is worth considering each option carefully.
- Ledgestone. We lay long, thin pieces in courses to create a strong horizontal line across the wall.
- Drystack. The pieces fit tightly together without a visible mortar joint. It has the simplest appearance, but it takes the longest to fit.
- Tumbled. The plant knocks off the edges of each piece, giving a new wall an older appearance.
- Split face. Each piece has a broken face with real depth. The uneven surface casts shadows that change throughout the day.
- Hand-stacked. We fit irregular pieces one at a time, creating the profile closest to a wall laid from fieldstone.
- Ashlar. This profile also uses mixed sizes, but the pieces are squared and dressed, giving the wall a much more formal appearance than hand-stacked stone.
- Stone veneer panels. Several courses are cast or cut onto a single back. Manufactured versions are sold as faux stone panels, and these panelized ledger units install faster than loose pieces.
For an outside corner, you buy corner units that wrap around the edge in one L-shaped piece. The wrap keeps a sawn edge from showing on either face.
Good blending is just as important as the profile you select. As we lay out a section, we pull pieces from several pallets at once. Mixing the pallets keeps the color lot from one crate, the batch in which the stone was cast or quarried, from forming stripes across the wall.
We also order beyond the measured area, leaving spare stone to sort through rather than forcing us to work around a shortage. Foam shape stock wrapped in plaster is an entirely different material, and we handle it as part of our decorative trim work.
Where Stone Meets Stucco on One Elevation
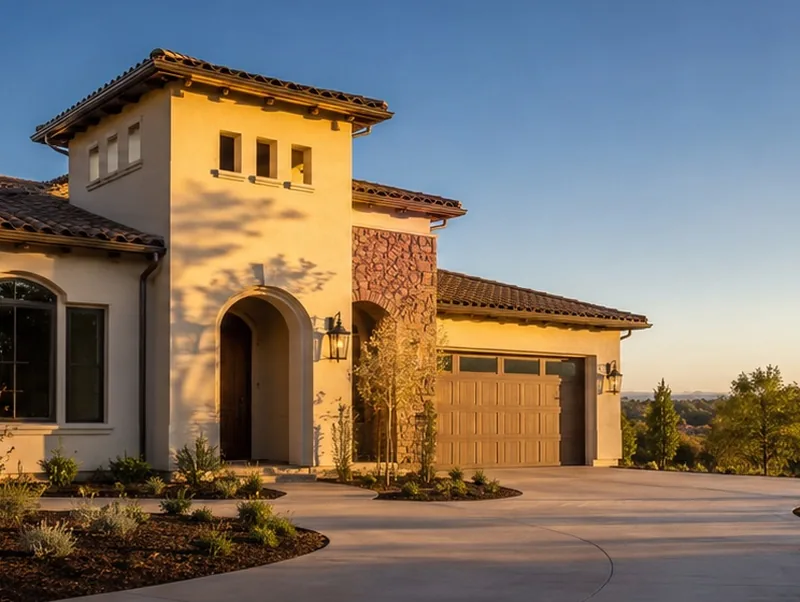
On an elevation where stone veneer meets stucco, the joint between them matters more than the open field of either material. Most of the pieces needed to build that joint must be purchased and staged ahead of time, so we mark the dividing line on your drawing before ordering either material.
- The stop line. We agree on the drawing where the stone will end and the plaster will begin.
- A metal edge. We terminate the plaster against a metal edge so the stucco ends in a clean, straight line.
- A sill, a cap, or a course that steps out. At the top of the stone field, this projecting piece throws water clear of the wall.
- The barrier lap. Behind the stone and stucco, we lap the upper barrier layer over the lower one so water continues downward.
- The setting order. We decide which material goes on first based on whether we can finish the second material properly against it.
- The top course. The stopping line must account for the stone pieces because we cannot saw the top course paper-thin to meet an unplanned line.
We set both sides of this edge, including the stone cladding and the plaster that runs up to it. Building the plaster assembly itself falls under our stucco installation work.
Why Choose St. George Elite Stucco for Stone Veneer
You will see every layout decision in the finished stone wall, including the blend, the corner layout, and the line where the stone stops. Those choices are fixed by the time the first piece goes on. Once we set that piece, we cannot adjust them without removing stone from the wall. We work through those decisions with you on the ground, where changing your mind is still inexpensive.
Layout, Blending, and a Dry-Lay You Approve
Before we mix anything, we lay out a section of the wall flat on the ground. We settle the stone veneer blend by pulling from several pallets at once, then cut the corners and openings from the layout before setting begins. The pieces placed along visible edges are chosen for those locations instead of coming from whatever happens to be left. You can stand with us and watch each step.
The dry-lay also lets us be clear about what we cannot promise. Stone is a natural or cast product with variation between lots, and nobody can tell you how the finished wall will look until the stone is on the ground in front of you.
Licensing and Coverage You Can Check Before Any Stone Is Set
Before we work on your wall, you can verify our license and insurance coverage. We carry general liability and workers' compensation. Certificates are available before work starts, and our license number goes on every written estimate. Utah licenses contractors at the state level and maintains a public license lookup, so you can check that number yourself.
That license is a stucco contractor license. There is no separate masonry certification behind our stone veneer work and no manufacturer installer program. Ask for the certificate before the crew arrives because it shows the coverage in place on the day the certificate was issued. Call (435) 236-2699 or use our quote form to schedule a free on-site estimate.
What Changes the Price of Stone Veneer
Two walls of the same size can end up with very different stone veneer siding prices, so we measure the work before providing a quote. We measure flats, the pieces covering the open run of a wall, by the square foot. Corners are measured by the linear foot. We count them separately because setting a corner takes different work from covering the same span of open wall.
- How much of the elevation gets stone, and where it stops. An accent band and a full elevation are different jobs, even when they are on the same house.
- The number of outside corners. We count corners separately from the flat area because each corner takes longer to set than the same span of open wall.
- Natural or manufactured stone. Your choice changes both the material cost and the freight required to get the stone here.
- The profile and the joint. With the same stone, a drystack profile takes longer to fit than a grouted joint.
- The substrate. The surface receiving the stone may be bare sheathing, clean block, painted block, or an existing stucco wall. Each one requires different preparation before we set the first piece.
- Height and access. A gable or a second story determines the scaffold we need, and the estimate shows that scaffold as its own line.
- What the structure is. A flat elevation, a column, and a fireplace chase require different amounts of layout, even when the square footage is the same.
Nobody can price your wall over the phone because the corners have not been counted and the surface behind the stone has not been inspected. After the walkthrough, you receive an itemized scope in writing. To arrange an on-site inspection, call (435) 236-2699 or use our quote form.
Substrate, Drainage Plane, Lath, Scratch Coat, and Stone Setting
St. George Elite Stucco completes a stone veneer job in five steps, beginning with a free walkthrough and ending when you approve the finished wall.
-
Walkthrough, Measurement, and a Written Estimate.
We walk the elevation or structure with you and measure the face area. We also count the corners and inspect the surface where the stone will be fixed. Afterward, you receive a written scope with the price attached, and the walkthrough itself is free.
-
Choosing the Stone and Approving the Dry-Lay.
You choose the stone family and profile, along with how you want the joints between the pieces finished. Before setting begins, you approve the dry-lay. The approved dry-lay remains in place as our reference throughout the job. Where your community reviews exterior work, we supply the color and texture samples.
-
Substrate Preparation and the Drainage Plane.
Depending on what we find, we clean the wall or open it so the surface is ready for the next layers. We install the drainage plane before anything else goes on. We also verify the jurisdiction and handle required permit applications.
-
Lath and the Scratch Coat.
Before mixing any mortar, we fasten the lath to the prepared wall. We then complete the scratch coat. Both are checked before we begin setting pieces.
-
Setting, Pointing, and the Final Walkthrough.
We set the corners first, then fill in the field between them. Based on the joint style you approved, we either point the joints by working in and tooling the mortar or fit the stone tightly with no visible joint. Once the stone is set, we wash down the finish. We then walk the completed wall with you and clear the site.
To put your walkthrough on the calendar, call (435) 236-2699 or send your details through the quote form.
Caring for a Stone Wall in the Desert Sun
Stone walls age differently here than they do in a wet climate. Sun is the dominant source of wear, although valley winter nights do drop below freezing, so saturated bottom courses can still be damaged as water freezes and expands. That exposure is why cast units use iron oxide pigment. Dust is more likely to collect in the open joints, while a sprinkler running every night usually affects the bottom courses more than the weather does. Rain comes in a few heavy summer storms instead of steady wet weather, so the barriers behind the stone must handle a large amount of water at once.
Cleaning Efflorescence and Avoiding Damage
You may eventually notice efflorescence, the white haze that forms when moisture carries dissolved salts through masonry. After the moisture reaches the surface and evaporates, it leaves those salts behind. Efflorescence usually wears away on its own, and a dry brush removes most of what remains. When the haze keeps returning, water is getting into the wall.
Start with plain water and a soft brush when you wash stone veneer. A pressure washer can drive water behind the stone instead of carrying dirt away, so keep high-pressure spray off the wall. Acid cleaners also cause damage because they attack the mortar joints and can lift color from the stone face. If a sprinkler head sprays the wall, redirect it away from the bottom courses.
Sprinklers leave marks that can look similar to efflorescence, but the deposits come from different places and require different cleaning. Efflorescence moves out through the wall, while sprinkler minerals land on the surface with the water.
Deciding Whether to Seal the Stone
You do not have to seal a stone wall. If you choose to apply a sealer, use a penetrating product that soaks into the stone and allows the wall to remain breathable. It makes the face easier to wash without closing up the stone. A film-forming sealer stays on the surface instead, where it can add gloss and trap moisture behind the coating.
Sealer provides the most benefit on porous stone, in splash zones, and around a BBQ island where grease can reach the surface. We do not paint stone because removing paint from a stone wall is very difficult. Paint and coatings intended for a plaster wall belong to a separate service.
Setting Stone Veneer Throughout Washington County
Across Washington County, we install stone veneer the same way, but access, staging, and afternoon sun affect how we plan the work at each property. A normal year brings 50 to 60 days above 100 degrees, so we work on shaded elevations during the hottest part of the day and handle exposed elevations earlier. On a tight lot, the places available for scaffolding and stone pallets can have more effect on your schedule than the stone itself.
Where St. George Elite Stucco Installs Stone Veneer
St. George Elite Stucco installs stone veneer throughout Washington County. Our service area reaches from the connected cities around St. George to smaller settlements near the county's valleys and mountain approaches, including:
- St. George, Washington, Santa Clara, Ivins, Hurricane, La Verkin, Toquerville, and Leeds
- Winchester Hills, Diamond Valley, Dammeron Valley, Veyo, Brookside, Central, and Pine Valley
- Gunlock, Shivwits, Virgin, and Apple Valley
Stone Veneer Questions in Southern Utah
During stone walkthroughs, homeowners in St. George and throughout the rest of Washington County often ask how to identify the material and what to expect during installation.
How can I tell natural stone veneer from manufactured stone?
Step back far enough to study a large section of the wall, then look for faces that repeat. Manufactured units, also labeled cultured stone or faux stone, are formed in a small number of molds. As you scan the wall, you will eventually find the same face more than once. Quarried stone does not repeat because every piece is naturally different.
What goes behind stone veneer on a framed wall?
If possible, ask to see the framed wall while the lath is still exposed. You will be able to see both the barrier and the lath, including where the lath is fastened into the framing. We next apply the scratch coat that receives the stone. Once that coat covers the wall, you can no longer see the materials behind it.
Can stone veneer go over my existing stucco wall?
Yes, provided the existing plaster is solid and firmly bonded to the wall. Before moving ahead, we tap across the stucco to check that bond. The added thickness of the stone cladding also affects the surrounding details. Every window and door reveal, the depth from the wall face back to the frame, becomes shallower, so we determine how to handle the trim before setting the stone.
How do stone and stucco meet on the same elevation?
We establish the line where the stone and stucco meet when we order the materials, before we begin setting stone. The metal edge must be on site first, along with the cap or sill and the trim. We then order the top course of stone veneer to fit that meeting line.
What does stone veneer cost?
We calculate your price from the measured scope of the actual project, so we do not publish a general figure here. As you compare quotes, make sure each one prices the corners separately from the flat sections. That separation helps you determine whether both totals cover the same work.
Do I buy the stone myself, or do you supply it?
You can purchase the stone directly, or you can have us supply it for the project. When you buy the material, you are responsible for ordering the correct quantity and corner count. A mid-job reorder can arrive from a different color lot than the stone already installed, leaving you with material that does not match. The same color-lot risk applies to every format, including loose pieces, stone veneer panels, and faux stone panels.
Start with the Elevation and the Stone
Send us any elevation drawing you have, or use a photograph of the wall if that is easier. Include any stone a supplier or your builder has already shown you. When we visit the property, we take the measurements and check the wall that will support the stone veneer. The visit is free, and you receive the estimate in writing. Call (435) 236-2699 or request a free estimate through our quote form.