
Stucco Remediation in St. George, UT | St. George Elite Stucco
St. George Elite Stucco has provided stucco remediation for residential and commercial properties in St. George, Utah for 15 years. We are a licensed and insured stucco contractor, and remediation is appropriate after a repeat failure. The work begins with moisture mapping and can include kickout flashing at a roofline, sill pan flashing under a window, drainage plane repair, and resetting the clearance around a buried weep screed.
On a failing wall, a moisture meter helps us compare suspect and dry areas. Kickout flashing is bent metal at a roof-wall junction, while sill pan flashing is the tray beneath a window. Behind them is the water-resistive barrier, the drainage plane that carries water down and out. At the bottom, the weep screed must have the clearance required by the residential building code.
Efflorescence and hollow areas on the wall are signs of water whose source is behind the finish. St. George receives only 8.80 inches of rain in a normal year, so moisture intrusion tends to follow concentrated paths rather than come from general wetness. Our other stucco services include repairing the patch itself, applying an even recoat, completing a tear-off, and adding the coating that goes over any of them.
We work on failing walls throughout Washington County, including St. George, Hurricane, and Washington. We survey the wall first because the findings must set the scope before we quote you a number.
Request a Free Estimate
We're ready to take on your project!
Stucco Remediation: How We Correct the Cause Behind Repeat Damage
A wet mark on a plaster wall does not automatically mean you need stucco remediation. The deciding factor is whether the same spot has already been repaired and then failed again. When damage returns, it is usually because water intrusion behind the finish is causing the new failure. A wall that needed a repair one year can therefore need remediation the next because the earlier repair gives us new evidence.
To determine which service fits, we look at what has happened in that area before, what the wall is showing now, and where remediation ends before another scope begins.
Repeated Damage Is the Trigger
You might have a crack at a window corner, a stain below a gutter, or a failed patch lifting along one edge. Each problem on its own can be ordinary wear that calls for a repair. Remediation has a narrower trigger, which is recurring damage that has returned in the same place after someone already fixed it once.
A patch is the newest material on the wall, so it gives way before the surrounding surface when water continues to arrive behind it. That second failure turns a straightforward patch into an investigation. The type of crack is a separate issue that we address through our stucco repair work.
We also will not claim that a crack proves the foundation is moving because only a structural engineer can make that determination. When the cracking pattern points to possible foundation movement, we tell you and recommend having it assessed before we prepare a scope for any plaster work.
Signs That Water Is Behind the Finish
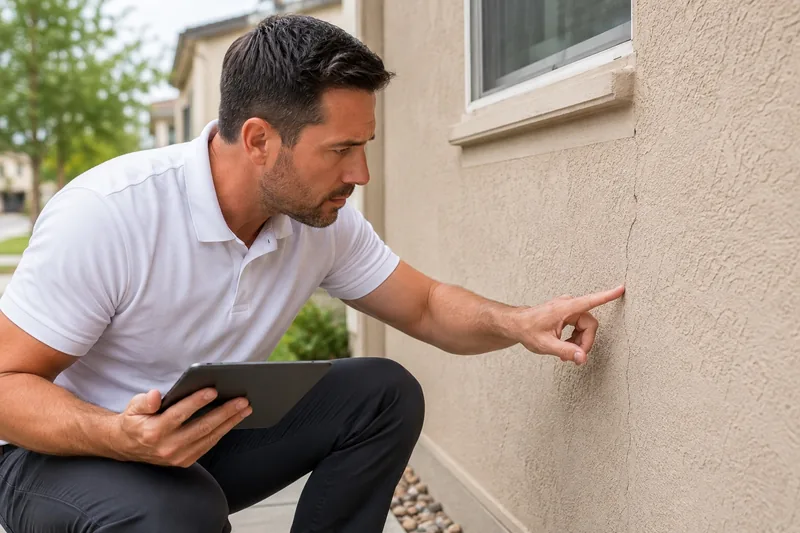
Before calling anyone, photograph four signs if you can. Efflorescence is the white, powdery bloom left on the surface after water travels through cement and dries. Hollow areas, or hollow spots, are sections of plaster that sound different when tapped because the plaster has separated from the material behind it.
Brown or rust-colored water staining below a window head or along a roofline shows where moisture has been running. On the inside of the same wall, blistering paint or a soft area of drywall provides evidence from the other side. Each symptom confirms that water has been present, but none identifies where it entered.
Finding the entry point requires us to measure the wall instead of relying on appearance alone. A moisture meter gives us readings that we compare across the wall, and we complete the survey before using its findings to set the scope.
Where Remediation Ends and Restoration Begins
Remediation is complete only after we have corrected the water path and proved the correction. Several jobs that people describe as remediation are actually separate scopes with separate prices, so you should know where one service ends and another begins.
When the work involves classifying a crack and rebuilding the patch, it belongs under our stucco repair service. Removing a wall down to the sheathing and rebuilding it to code falls under stucco replacement and removal. If an entire elevation, meaning one full side of a building, has become patchy and needs an even appearance, the appropriate service is resurfacing and recoating.
Applying the paint or coating that goes over the finished wall is part of our painting and coatings work. For a homeowners insurance claim involving the damage, you can find the documentation process on our stucco repair page. At the end of remediation, you receive a corrected junction along with a record showing that the wall is drying.
Mapping Moisture Before We Set the Stucco Remediation Scope
Before we price stucco remediation, we need to find out how far the wet area extends. We survey the wall first because the evidence must define the affected area before we can set the scope and price. Moisture-meter readings give us one part of the picture, along with the signs we can see on the wall. When the weather does not expose the water path, we also perform a water test. Gathering this evidence and completing the moisture mapping takes up most of our first visit to your property.
What a Meter Reading Proves and What It Cannot Prove
A pin meter measures the material between its two pins, so its reading applies only to the material the pins enter. A pinless meter checks a shallow depth below the surface without leaving marks. Neither type gives us a completely clean sample. Cement plaster, the exterior stucco material, can affect the reading, as can the paint covering it and the metal lath, the wire mesh beneath the plaster.
For that reason, we treat a moisture reading as a comparison against dry wall on the same elevation rather than as a verdict on its own. The same number can signal trouble on one house and be unremarkable on another. You can also get a dry meter reading over a wet cavity when the surface has begun drying but the space behind it is still wet. One reading never settles the question, so we compare several points before drawing a boundary around the moisture.
Recording Each Reading and Its Location on the Wall
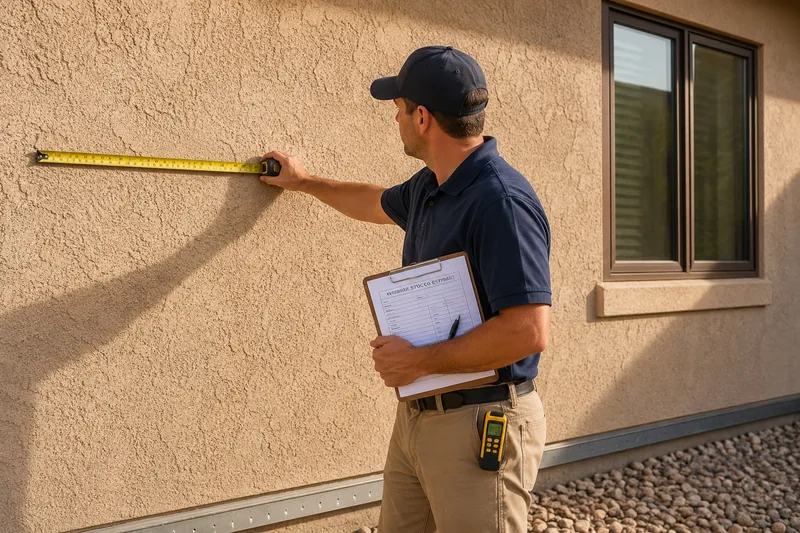
Every reading is recorded with the date and the exact point on the elevation where we took it. As we move around the property, those records build a moisture map across the elevation. The map does more than describe a generally wet area. It gives the moisture clear boundaries so we can write a scope that covers the affected area and identifies the wall involved, leaving you with a written scope for the work.
Readings from both sides of a window help us separate one possible water path from another. Wet plaster beneath the sill with dry plaster beside the frame makes the sill the suspect. When both areas are wet, the water is coming from higher up. You keep the moisture map after we leave, providing a record that later readings can be compared against so anyone can tell whether the wall is drying.

Correcting Flashing at the Roofline and Windows
When a leak keeps coming back, you will nearly always find the entry point at a junction rather than in the middle of an elevation. Two junctions cause most of the recurring leaks on houses here, including the line where a roof meets a wall and the head or sill of a window. We correct both with sheet metal that is integrated into the wall assembly.
Kickout Flashing Where a Roof Meets a Wall
Picture a roof edge that ends against a wall instead of continuing out to a gable. All the water shedding from that roof plane reaches the same point, so it needs something to direct it away from the wall face. Kickout flashing does that job. This bent piece of metal sits at the bottom of the roof-to-wall run and usually directs the water into a gutter.
A missing kickout, or one flattened by a ladder or a re-roof, allows water to run directly onto the plaster and get behind it. You may see a stain, a hollow patch, or a repair that keeps failing beneath one roof edge, often a foot or two below where the roof stops. To retrofit the flashing, we open the plaster at the roof-to-wall intersection and tie the new metal into the water-resistive barrier. The barrier and flashing can then carry the water along one continuous path.
Sill Pan Flashing Under a Window
Sill pan flashing is a type of window flashing that sits beneath a window sill like a shallow tray. It catches water that gets past the frame and drains it back out through the face of the wall. That drainage matters because some water eventually gets past every window frame.
The sealant around a window is a maintenance item that hardens and opens over time. Under this much sun, it does so sooner than most owners expect. A sill pan does not depend on the sealant staying intact, which is why a replacement window installed without one commonly causes a stain to return beneath the same opening year after year.
Fitting a sill pan requires us either to remove the window or open the wall below it. We therefore survey the junction first and use what we find to set the scope before quoting the work, rather than discovering the need on the day of the job. Whether the new sealant around the window takes paint afterward is a coatings choice.
Putting the Drainage Path Back Together
A repaired junction will not hold for long unless the materials behind it can still carry water down and out of the wall. Two parts create that path, including the barrier behind the plaster and the weep screed along the base. When either one is interrupted, the junction we just corrected becomes a wet area again.
Repairing the Drainage Plane and Water-Resistive Barrier
The water-resistive barrier, the layer behind the plaster, carries water down your wall and releases it at the bottom. The surface formed by the barrier is the drainage plane. Each piece overlaps the one below it like shingles, so any new material must tuck beneath the piece already above it.
That overlap determines whether the repair carries water out or creates another leak. If we lay a patch over the layer above it, the patch forms a shelf where water can collect. We therefore lift the barrier courses above the opening, slide the new material underneath them, and overlap it onto the material below. Flashing at the junction connects to the same barrier, so we correct the metal and the drainage plane together instead of handling them on two separate visits. Building the barrier from the beginning on a new wall is part of our stucco installation work.
Restoring Clearance Below the Weep Screed
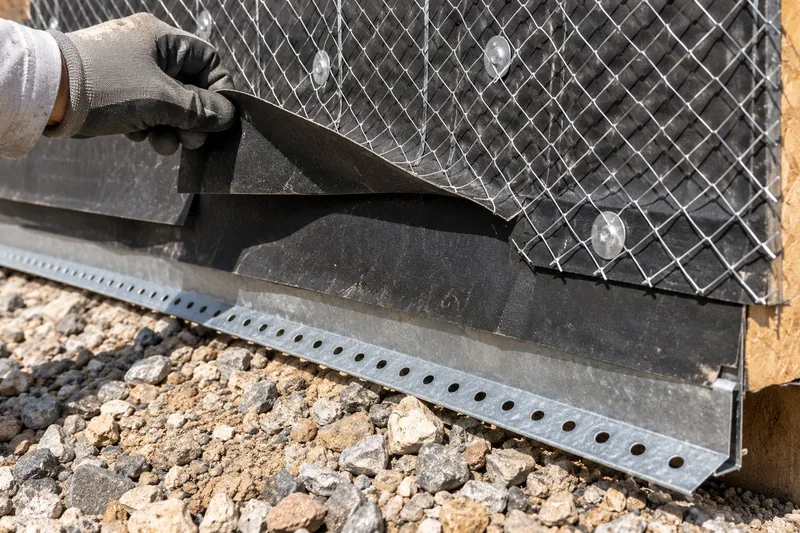
The weep screed is the metal edge at the base of the wall where water carried by the barrier leaves the assembly. The residential building code sets the weep screed clearance at not less than 4 inches above bare earth or not less than 2 inches above paving. You follow the figure that applies to the surface beneath that stretch of wall rather than satisfying both measurements at once. The Utah State Legislature () publishes which edition of the code applies here.
Most buried screeds did not start that way when the house was built. Planting soil may have been raised a little at a time over the years, or someone may have poured a patio after the house went up. Once soil or paving covers the screed, water cannot discharge through it and instead remains in the wall behind it. To reset the clearance, we cut the soil or paving back from the screed. That work is usually groundwork rather than plaster work.
Why Choose St. George Elite Stucco for Stucco Remediation
When the same area has failed more than once, two things shape how St. George Elite Stucco approaches the wall. First, we investigate the problem before quoting the work. You can also check our credentials and insurance before the job begins. Neither one is a promise about the outcome, because a wall that has been letting water in for years does not come with one. We do remediation work for houses, rentals and commercial elevations throughout Washington County.
The Wall Is Investigated Before We Quote a Number
If we priced the job before surveying the wall, we would be pricing the visible mark instead of the cause behind it. Those are two different jobs. The survey tells us how far the scope needs to extend, and that distance accounts for the difference between the two numbers. From your driveway, a stain beneath one window can look much like a barrier failure that crosses two elevations.
Once we know how far the problem runs, the written scope identifies every area it covers and clearly states where our work stops. Those limits are just as useful to you as the list of work because they show exactly what the quoted price includes.
What You Can Verify Before We Open a Wall
Before we work on your wall, you can verify our license and insurance coverage. We carry general liability and workers' compensation. Certificates are available before work starts, and our license number goes on every written estimate. Utah licenses contractors at the state level rather than city by city, so one license covers your property wherever it sits in Washington County. Insurance deserves particular attention when a job requires us to open a wall because the work goes beyond the finish and into the assembly behind it. Call (435) 236-2699 or use our quote form to schedule a free on-site estimate.
Why We Set the Scope After the Investigation
We cannot give you an honest number over the phone until we have examined the wall, because the missing piece is the scope itself. The survey comes first, and the scope follows. Once we know what the work involves, we can explain the factors that affect the cost of stucco remediation and how they determine the final stucco remediation cost.
- The size of the wet area. The survey shows us where the wet area ends, and the scope covers that measured area.
- Which junction is at fault. Repairing a roofline, a window or the base of a wall involves three different kinds of work, and each one is priced separately.
- Height and access. Before we can touch the plaster at a second-story junction, we need to place a scaffold or lift beneath it.
- How many elevations the path crosses. A house has four elevations, and the moisture path may run across one of them or three.
- What has to come off first. Removing a window, a gutter, a light fixture, paving or raised soil adds another step before we can reach the problem.
- Whether we have to open the finish, and how much. Reaching a barrier behind a junction takes more work than correcting metal that is already visible.
The walk-around and written estimate are free. Where a wall has to be opened to trace the path, that opening is named in the scope before it happens. We quote both the exploratory opening and the separately priced service that closes and restores it before you approve the work. To schedule an on-site inspection, call (435) 236-2699 or use our quote form.
Finding the Water Path, Then Closing It
St. George Elite Stucco handles stucco remediation in five steps, starting with the first look at the wall and ending with a check that the correction is holding. The first three steps produce a documented moisture map, any required laboratory results, and a written scope with pricing for each area.
-
On-Site Inspection and Moisture Survey.
We walk each elevation with you, take moisture readings and record exactly where we took each one. The visit is free, and the survey is included rather than charged as an extra. By the end of the visit, you have the map of those readings and locations.
-
Testing for Asbestos and Lead on an Older Home.
Before we open a wall, we arrange laboratory testing for lead in older coatings on a home built before 1978, and Utah requires an asbestos inspection by a certified inspector on a home built before 1992. We wait for the results before cutting anything because they determine how we must handle the opening.
-
Written Scope After the Investigation, Not Before.
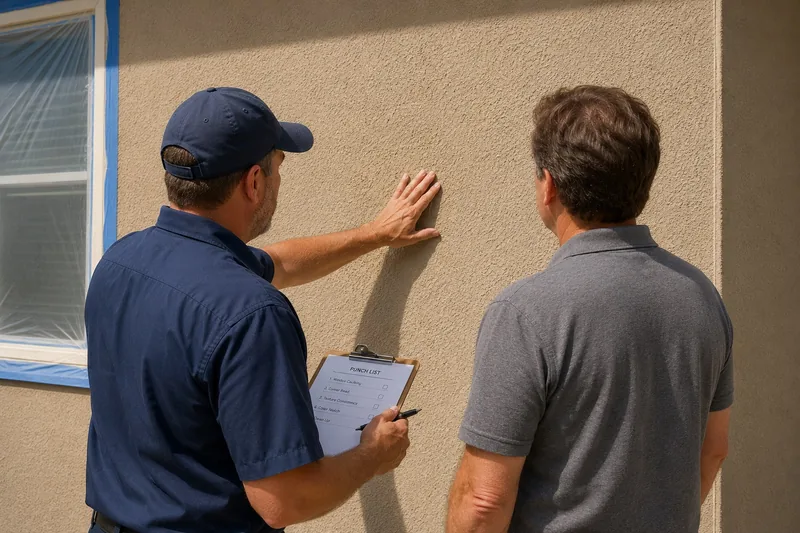
Once the survey is complete, we prepare a written scope and price each area named in it. The scope also identifies the parts of the wall we will leave untouched, so you can see exactly where the work stops. You approve everything in writing before we put the project on the calendar or order any materials.
-
Correcting the Flashing, Barrier, and Screed.
Before opening the wall, we cover the windows, planting and paving around the work area. We then open the junction, correct the metal and the barrier, and close the plaster back over them. The schedule depends on how many junctions the written scope includes.
-
Water Check and Walkthrough.
We wet down the corrected junction and take new readings to compare with the map from the first visit. Then we walk the elevations with you and clear away the staging and debris before leaving.
Call (435) 236-2699 to book the investigation, or describe the wall in our quote form.
Timing a Stucco Investigation Around the Weather
Water is easiest to trace while the wall is still wet because we can see clearer evidence of where it traveled. St. George has 50 to 60 days a year above 100 degrees, so dry days outnumber wet ones by a wide margin. You do not have to wait for particular weather before calling, but the wall’s condition when we arrive affects what we can see and makes the timing more important than most homeowners expect.
What a Storm Reveals After a Dry Week
After several dry weeks, moisture readings tend to look much the same across the surface. The wet area no longer stands apart from the sound plaster around it, so the water path becomes harder to follow. Moisture also leaves the surface faster than it leaves the cavity behind the plaster. A dry face therefore tells you very little about what remains deeper in the wall.
The day after wind-driven rain is usually when a suspect area becomes visible. If a stain appears, photograph it while it is still wet. The photo gives us better evidence than a description made later because the mark left after drying no longer shows how far the water reached.
Testing the Wall With Water During Dry Weather
Dry weather does not mean we have to wait for another storm before investigating the leak. For a staged water test, we patiently wet one area at a time, beginning at the bottom of the junction and working upward. As the water runs outside, someone watches the moisture meter on the inside face and compares each reading for a change.
Working in stages is how we go about locating a leak rather than merely confirming that the wall leaks. The first area that changes the meter reading identifies where the water is getting in. By contrast, wetting an entire elevation at once only confirms what you already knew about the leak and gives us no way to tell where the water entered.
Stucco Remediation Across Washington County
Washington County does not have a single climate. St. George sits at about 2,530 feet on the Mojave Desert transition. From there, the land climbs steadily toward communities where winters are genuinely cold. In the valley, heat and dry air work against water that enters a wall for most of the year. At higher elevations, the same water remains in the wall much longer. Your wall’s elevation helps us interpret its drying conditions, while moisture readings, stain patterns, and water testing identify the actual path.
Where St. George Elite Stucco Traces Water Intrusion
St. George Elite Stucco serves communities across Washington County, including the connected cities around St. George and smaller settlements near the county’s valleys and mountain approaches.
- St. George, Washington, Santa Clara, Ivins, Hurricane, La Verkin, Toquerville, and Leeds
- Winchester Hills, Diamond Valley, Dammeron Valley, Veyo, Brookside, Central, and Pine Valley
- Gunlock, Shivwits, Virgin, and Apple Valley
No matter where your property falls within that service area, we begin with the same survey before deciding where the water path leads.

Questions Owners Ask About Recurring Stucco Failures
Owners usually ask these questions after the same wall has failed twice. The answers below are the same ones we would give you while looking at the wall on site.
What does a moisture meter reading actually prove?
A moisture meter reading shows us a difference, not a verdict. The finish, any coating, and the metal lath all affect the instrument, so we compare the suspect area with dry wall alongside it. Even when the face looks dry, moisture can remain deeper in the wall. That is why the reading is one of three inputs we use rather than the whole answer.
What do kickout flashing and sill pan flashing actually do?
Kickout flashing and sill pan flashing both direct water out of the wall instead of letting it enter. Where a roof edge ends against a wall, the kickout sends runoff clear of the face below. Under a window, the sill pan catches water that passes the frame and drains it outside. The pan keeps working after the sealant around the window has opened, because the sealant and the pan do different jobs and cannot substitute for each other.
My weep screed is buried. What does resetting it involve?
We reset a buried weep screed by cutting back whatever covered it until the clearance is 4 inches above bare earth or 2 inches above paving, whichever applies to that stretch of wall. On plenty of houses, restoring that clearance is the entire correction, and we do not need to touch the plaster. We check the clearance during every survey before opening anything.
Why did the same corner crack again a year after it was patched?
The corner cracked again because the earlier patch repaired the visible damage without reaching the cause behind it. A first failure in one spot is ordinary, and a patch is the right answer. A second failure in the same place tells us the wall needs a survey. If you can, tell us when the earlier repair was done, because that date helps us narrow the investigation.
Do you have to open the wall to find the leak?
Sometimes, but we wait until the survey has narrowed the search. The readings, the stain pattern, and a staged water test usually direct us to one junction first, so we can make a small, deliberate opening without exploratory cutting. We identify any opening in the written scope beforehand, and we cut only what you have agreed to.
Is remediation the same as having the stucco replaced?
No. During remediation, we correct the water path and close the wall up, and the work stops there. A full tear-off is a separate service, as is an even recoat. We use the survey to determine which service your wall needs instead of judging the damage by how bad it looks from the drive.
Start With a Moisture Investigation
A spot that has failed more than once needs a proper moisture investigation. We take the readings first, then determine whether the wall needs stucco remediation or a smaller repair, because the survey has to set the scope before we quote the work. Please send photographs taken while the stain was still wet with the form. You receive our findings and the estimate in writing, and the visit is free. Call (435) 236-2699 or request a free estimate through our quote form.