
Stucco Resurfacing & Recoating in St. George, UT | St. George Elite Stucco
St. George Elite Stucco has provided stucco resurfacing and recoating for residential and commercial properties in St. George, Utah for 15 years as a licensed and insured stucco contractor. For homeowners and property owners, we renew the face of a wall with resurfacing while the material underneath remains sound. The three levels are a fog coat, a new finish coat, and a full re-skin. We apply them across whole elevations, meaning one entire side of a building.
Before we price the work, we sound the wall by tapping each face to check whether it is solid or hollow. A hollow note points to delamination. A new finish can include integral iron-oxide pigment, which carries the color through the material, along with graded float sand that determines how coarse the surface will be. We apply the cement plaster according to ASTM C926, the standard governing how this material goes on.
St. George sun and heat pull color from stucco, and we restore that color with resurfacing while the assembly behind the finish is still sound. Damage confined to one area calls for stucco repair. A wall that fails repeatedly in the same place needs remediation, while a finish that must come off calls for replacement.
We recoat walls in St. George, Washington, Ivins and across Washington County. Before any work is booked, your estimate names the resurfacing level for each wall face.
Request a Free Estimate
We're ready to take on your project!
Stucco Resurfacing & Recoating: Fog Coat, Finish Coat, or Full Re-Skin
Stucco resurfacing comes in three recoating levels, and each level adds more material to the wall than the one before it. The price rises with that added work. The condition of the finish decides where your wall belongs on the three-tier ladder, regardless of the budget. Before we apply any of these recoating options, the wall behind the finish must be sound.
A Fog Coat When Only the Color Has Gone
A fog coat is a slurry, a thin, soupy mixture of portland cement, lime, and mineral pigment that we spray onto stucco after it has cured. It renews the color across an entire wall face without changing the existing texture because the mixture is too thin to reshape the surface. A painted or sealed wall cannot take a fog coat because the cement wash needs bare, absorbent stucco to bond.
The thinness of a fog coat also sets its limit. It adds no thickness, so it fills nothing. You will still see a crack, a hollow area will remain hollow, and a chipped corner will continue to show. Because a fog coat is cement, it bonds into the wall itself. Once it has cured, the face has an even color while the wall underneath remains unchanged.
A New Finish Coat Over a Sound Base
The finish coat is the top layer of a cement stucco wall, so it is the part you see and touch. Beneath it is the base, the thicker cement layer that gives the wall its strength. Once we have cleaned and prepared a sound base, we apply a fresh finish coat over it. This level renews the texture and color together, making it the right choice when you want a different appearance as well as a newer surface.
A mineral cement finish gives you a hard mineral surface with the color mixed into the material. It also contains graded float sand, and keeping the selected grade consistent across the entire wall takes careful work. Since we leave the material beneath the finish in place, you end up with a new surface and a new color over the existing base.
A Full Re-Skin Over the Existing Wall
When a lighter coating will not hold, a stucco re-skin is the heaviest resurfacing level short of removing the wall from the building. We build a new cement face over the wall already in place and bond the two together, bringing the whole elevation back to one continuous surface. First, we apply a bonding agent that gives the new material something to grip. Some walls also need new lath, the metal mesh that a cement coat keys into. Adding new lath falls under our stucco installation service.
We carry the control joints through the new face as well. Control joints are the deliberate straight breaks built into a stucco wall to give it room to move. Covering one with a continuous new face simply causes the new material to crack along the same line.
A full re-skin suits a wall face that has crazed, developed a fine network of shallow cracks, weathered through, or accumulated so many old patches that one more repair will not settle the surface. We deal with hollow areas before applying the new face and never cover them over. Once the stucco assembly must be removed altogether, including the finish, base coats, and lath down to the sheathing, you need stucco replacement and removal rather than a recoat.
Choosing the Lightest Option That Will Hold
Each level on the stucco resurfacing ladder has conditions that rule it in or out. After we inspect the wall, we choose the lightest level that its condition will support. Choosing anything lighter leaves you with a finish that fails early, while going heavier means paying for material the wall does not need. The right option is the lightest one that will actually hold.
How the Surface Condition Determines the Level
When you want to renew faded or chalky color without changing a texture that remains crisp, a fog coat is appropriate. When the finish has worn thin, become uneven, or turned patchy over a base that is still bonded, the wall needs a new finish coat. A full re-skin is the right level when the face has crazed broadly or weathered through to the base. The same applies when old patches have accumulated until the repairs outnumber the original wall.
Your color choice also affects the level. A fog coat can shift the existing color only within a narrow range, so a genuinely different color requires a finish coat with integral pigment. We repair any cracks first under our stucco repair service.
Sounding the Wall for Bond and Finding What Rules Out a Recoat
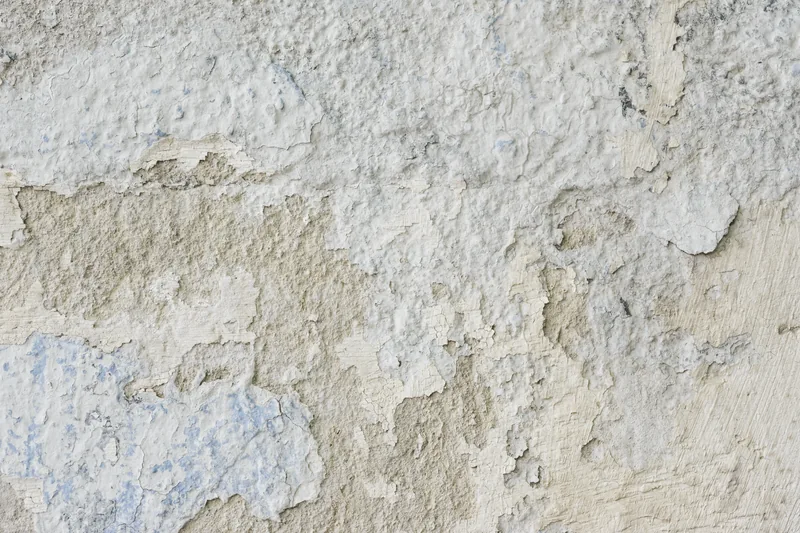
To check the bond, we sound the wall by tapping a hard tool across the face from corner to corner and listening to the response. Where the finish remains attached to the material behind it, you hear a solid ring. A loose area produces a hollow, drummy note. That sound indicates delamination, where the finish has separated from the layer beneath it and remains hanging on the wall without being bonded to it.
One hollow note does not settle the question, so the test takes an experienced ear that recognizes both sound and loose areas. Cement stucco on a wood-framed wall spans the gaps between the studs, which means it can sound hollow in those bays and still be perfectly sound. Synthetic stucco has a thin coat over foam board and sounds hollow across the entire wall by design. We map where the drummy sound occurs and how far it extends rather than treating every hollow note as a failure.
Recoating a delaminated area adds weight to a layer that is already letting go. When that layer finally releases, the new coat comes away with the old finish still stuck to its back. We cut those areas back to sound material before pricing any recoating work. When a wall fails again in the same place, the repeated failure shows us that the cause is behind the finish and belongs under our stucco remediation work. During the same inspection, we also check for bulges, lifting edges, and staining.
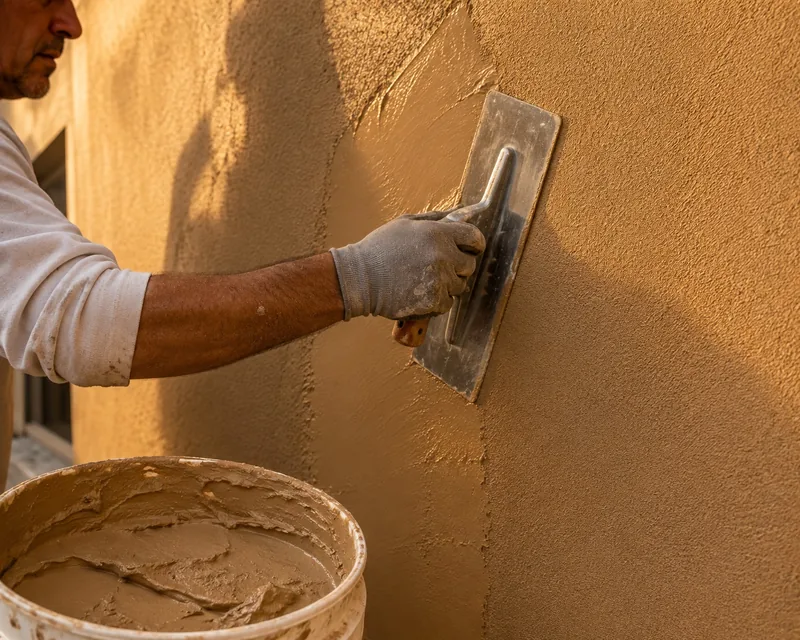
How We Prepare an Old Wall for New Cement
For new cement to bond, the old cement must be clean, sound, and damp. A wall that has stood in the Southern Utah sun is usually dirty and bone dry, so two of those three conditions are missing. We take care of both before the mixer ever starts. First, we clean the wall. Then we wet it, and only after that do we apply new material.
Removing Chalk, Dust, and Loose Material from the Face
When you run your hand down a weathered wall, it may leave a fine powder on your skin. That powder is chalking, and we have to remove it because new cement cannot bond through loose chalk and dust.
We wash the face until we reach clean, sound material, then use a wire brush and scraper on anything the washing leaves behind. Efflorescence, the white salt bloom that appears on cement walls, requires different treatment. We remove it dry with a stiff brush and never wash it into the wall. When the salt keeps returning, water is moving through the wall from somewhere, so the wall needs remediation before it receives a coating.
Existing paint also affects what we can apply. The same is true of an elastomeric film, the thick, flexible coating sometimes rolled over stucco. We handle the choice of what can go over those surfaces as part of our stucco painting and coatings work.
Suction: How a Dry Wall Pulls Water from Fresh Cement
Cured plaster is porous. When a dry wall has been heated by the sun, it begins pulling water from a fresh cement mix as soon as the two surfaces touch. Cement hardens through hydration, a chemical reaction that needs water to run to completion. If the wall draws that water out too early, the new mix never hydrates properly. It can then dust under a fingernail and fail to bond.
Before applying the new coat, we dampen the wall so it does not pull water from the mix too quickly. We also keep the surface damp afterward while the cement cures, a trade practice known as moist curing. With 8.8 inches of precipitation in an average year, a wall here is dry almost every day it stands. Managing that water is therefore one of the hands-on steps in preparing and curing the new cement.
Keeping Color and Texture Consistent Across a Whole Elevation
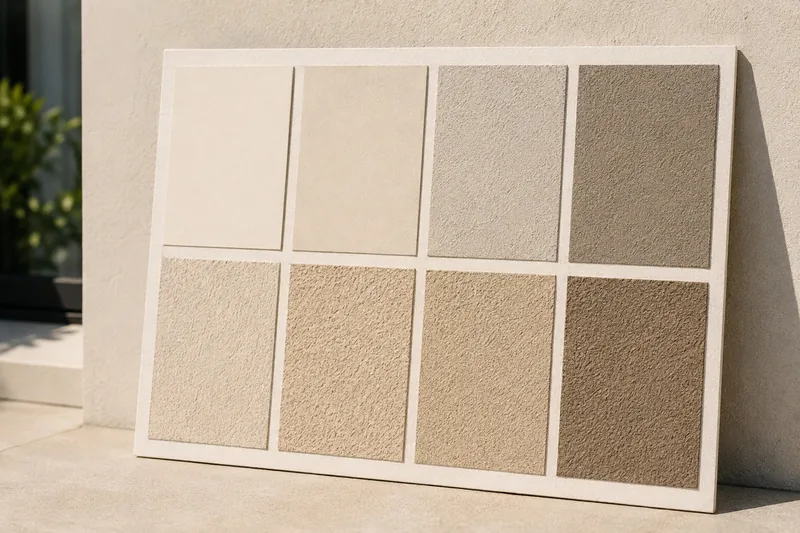
Coating an entire wall face makes consistency the main challenge. We have to carry one color and one texture evenly from end to end because even a slight change becomes visible across an area that large. Before we coat any wall, we settle the color and texture together. The whole elevation then becomes the working unit for both.
Iron-Oxide Pigment Mixed Through the Finish
Integral pigment, the color mixed directly into the finish material, travels with the cement wherever we apply it instead of sitting only on the surface. Iron oxide is the standard mineral pigment for cement work because it holds its color against both the alkalinity of the cement and prolonged sun exposure. The benefit becomes especially clear years later. A chip in an integrally colored coat exposes the same color underneath, while a chip through a surface coating reveals the material below it.
Because pigment is batched by lot, we mix and apply one elevation together so lot differences never meet in the middle of a wall face. After completing the elevation, we record the color formula and the lot used in your file.
Matching a Texture Across the Entire Wall Face
The texture you see depends on two things, including the grade of sand in the finish and the way the applicator works it. Graded float sand is screened to keep the particles within a controlled range of sizes. A coarser grade produces a coarser float finish, so we specify the sand rather than using whatever happens to be available.
Once the mix is on the wall, we use different tool methods to produce four named textures from the same finish coat. For a sand float, we work the material flat with a float, the flat-faced hand tool that gives the texture its name, leaving an even grain. We create a dash by throwing on the finish and leaving it rough. A lace begins as a thrown texture, but we knock it back flat in patches so raised islands remain over a flatter ground. With a skip-trowel, we move the trowel across the wall in broken passes that leave a scattered pattern of low ridges.
Before committing an entire elevation to a texture, we make a sample area on your own wall. You see it outdoors under the same light in which the finished surface will remain. After you have seen the sample, one mix and one crew take the wall face from start to finish in a single session, working from one natural break to the next. Bands, arches, and columns accept finish differently, so we handle them through our decorative stucco work.
Why You Can Still See a Partial Recoat
Freshly mixed stucco has not yet weathered, even when its color formula matches the existing wall exactly. St. George has around 255 sunny days in a year, and the existing wall beside the new work has been aging through all of them. So the new face looks lighter and cleaner beside it, no matter how good the formula was.
The place where old and new work meet creates another visible difference. A stop line in the middle of an open wall remains noticeable regardless of how closely the color matches. We therefore end a wall face at a corner, a control joint, or a trim line. For the same reason, the elevation is both the unit of work and the unit of pricing. When a small damaged area needs to blend into the sound wall around it, we address it through our stucco repair work.
Why Choose St. George Elite Stucco for Stucco Resurfacing & Recoating
Stucco resurfacing falls between a repair and a new installation, but the work has its own requirement. We must reproduce one color and one texture across an entire wall face, with the level of work agreed on before the job begins. Whether an elevation needs a fog coat, a finish coat, or a full re-skin, St. George Elite Stucco names the cement finish and specifies it for a wall that stands in the sun almost every day of the year. We also put the level for each elevation in writing before we start work.
Your Estimate Names the Level
Our itemized estimate identifies the level for every elevation. A fog coat on the north face and a re-skin on the south face appear as two separate lines with two different numbers. Once we have set the level, we price every scope within it on its own line. The estimate also identifies the elevations we are deliberately leaving alone. Read that part first, since it shows the outer edge of what you are buying. You receive the same written breakdown for one faded elevation as you do for a whole building.
How to Check the License and Certificates
Utah issues stucco licenses at the state level, so one license number covers work anywhere in Washington County. Before we work on your wall, you can verify our license and insurance coverage. We carry general liability and workers' compensation. Certificates are available before work starts, and our license number goes on every written estimate. Ask for a current certificate when you book, because a lapsed certificate protects nobody. Call (435) 236-2699 or use our quote form to schedule a free on-site estimate.
Why the Three Levels Price Differently
The three resurfacing levels each put a different amount of material and labor on the same wall. The level you choose therefore accounts for most of the price before we count anything else. When two bids for the same building are far apart, the chosen level usually explains most of the gap, and the amount of preparation included usually explains the rest. Six factors can move the stucco resurfacing cost up or down.
- Which level each elevation needs. Each of the three levels has its own price, and different elevations on one building can need different levels at the same time.
- How much wall there is. We measure each elevation in square feet, so coating four wall faces costs a different amount from coating one.
- Height and access. Before we can move any material onto a two-story elevation, we need scaffold or a lift positioned beneath it. The price includes that setup whether the upper wall face is large or small.
- How much preparation is inside the number. Before applying the coat, we may need to wash the wall, remove chalk, cut back unsound material, and repair cracks. The preparation often varies much more between two walls than the coating itself does.
- Texture and color. Working a heavy lace texture takes longer than applying a sand float, while a custom integral pigment costs more than a standard one.
- Where the work stops. Carrying the coating to a corner or a control joint uses more material than stopping short. The stopping point also often determines whether the finished wall looks continuous.
An itemized bid gives you a practical way to compare two numbers. Before accepting an estimate, ask each contractor to identify the level for every elevation and show preparation, repair, coat, and finish on separate lines. With that breakdown, you can see the scope behind the price difference. One recoating estimate may cover three faces at the lightest level, while the other rebuilds four faces.
We do not quote a per-square-foot figure over the phone because we have not yet seen the access around your walls or the condition of the stucco. We measure everything on site, then give you the written scope well before we schedule the work. For an on-site inspection, call (435) 236-2699 or use our quote form.
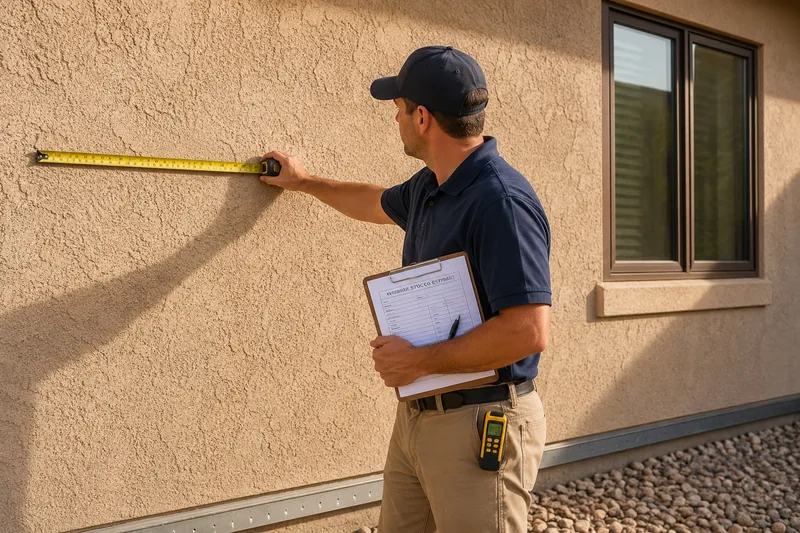
Bond Check, Prep, Recoat, Cure
At St. George Elite Stucco, we take the wall through four phases, including the bond check, preparation, recoating, and curing. For you, those phases unfold in six steps, beginning with our first visit and ending with a final look around the building.
-
On-Site Look and Bond Check.
We walk every elevation with you, sounding the wall one face at a time. We also photograph each face and record the date on the file.
-
A Written Estimate With the Level Named.
Before we schedule anything, you receive a written scope that names the level and prices the work line by line rather than giving you a single figure.
-
Color and Texture Approval on a Sample Area.
You approve the color and texture on a sample area before anything else is ordered. When your community reviews exterior work, we provide the color and texture samples needed for that review.
-
Masking, Washing, and the First Repairs.
Before any wet work begins, we cover the windows, plants, and paving. We then wash the wall, cut back loose material, and complete any repairs named in the scope.
-
Recoating the Elevation.
We apply the coat to one wall face at a time and work it to match the texture you approved on the sample. Each coat stops at a corner or joint, never partway along a wall.
-
Curing, Walkthrough, and Cleanup.
While the new finish cures, we keep it damp for at least 48 hours, fogging it more often in direct sun, heat, low humidity, or wind. We do not apply plaster when the ambient temperature is below 40 degrees Fahrenheit, so cold nights can set the schedule. We leave the scaffold in place until the coat has hardened. We then inspect every face with you before removing the staging and debris.
To put your wall on the schedule, call (435) 236-2699 or send the project details through our quote form.
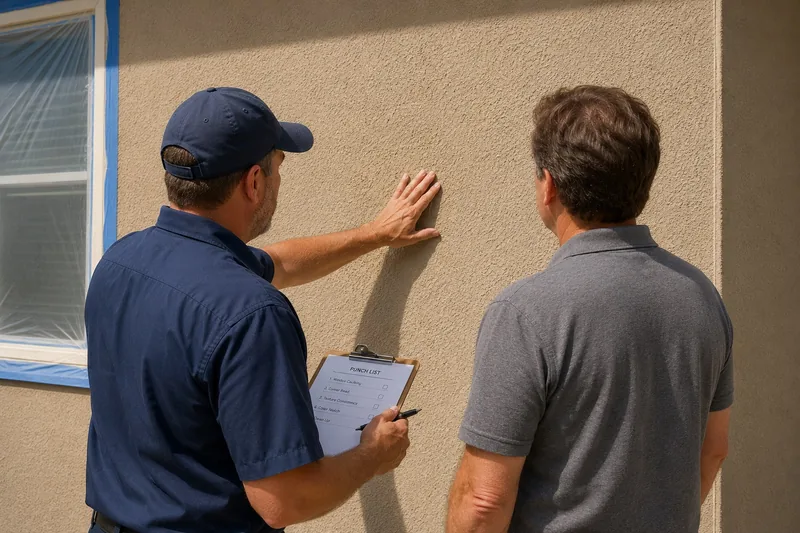
Timing Stucco Resurfacing Through a Southern Utah Year
When homeowners ask when to recoat stucco, they are usually asking two different questions. The first is which time of year gives the crew good working conditions. The second is which elevation needs attention before the others, and it is often a different wall from the one that prompted you to call.
Finding a Good Working Window
Crews can work through the high summer here, but we plan each day around the sun instead of treating every wall face the same. We coat a shaded elevation while the sun is on the far side, then move around the building as the sunlight shifts. The valley averages 50 to 60 days above 100 degrees, so that order can make the difference between a manageable July workday and material that becomes difficult to handle. Cold nights set the limit at the other end of the year. When you have a choice, spring and fall provide the widest working window, and most of our recoating work is booked during those seasons.
Signs That a Wall Is Due for Renewal
You can look for three signs that the finish is ready for renewal. Uneven color from one wall face to the next is the first, and it is often easier to spot from the street than from the driveway. Another is chalk left on your hand after you run it down a dry wall. The third is a texture that feels soft or open when you press it with a fingernail.
We do not publish a set number of years for how long a finish lasts because exposure, rather than the calendar, determines how quickly it weathers. South- and west-facing elevations take the most sun, so they usually show their age first. One wall face can therefore be due for recoating while the other elevations still have years left. You can treat that as a budgeting decision and complete the work one elevation at a time.
Before recoating begins, check whether a sprinkler is throwing water onto the wall and move the head if it is. Repeated wetting leaves mineral stains along the bottom of the finish, and it will mark a new finish just as readily as an old one. In the meantime, keep the sealant lines around windows and pipe penetrations sound. Once water gets behind the finish, the wall needs remediation rather than a recoat.
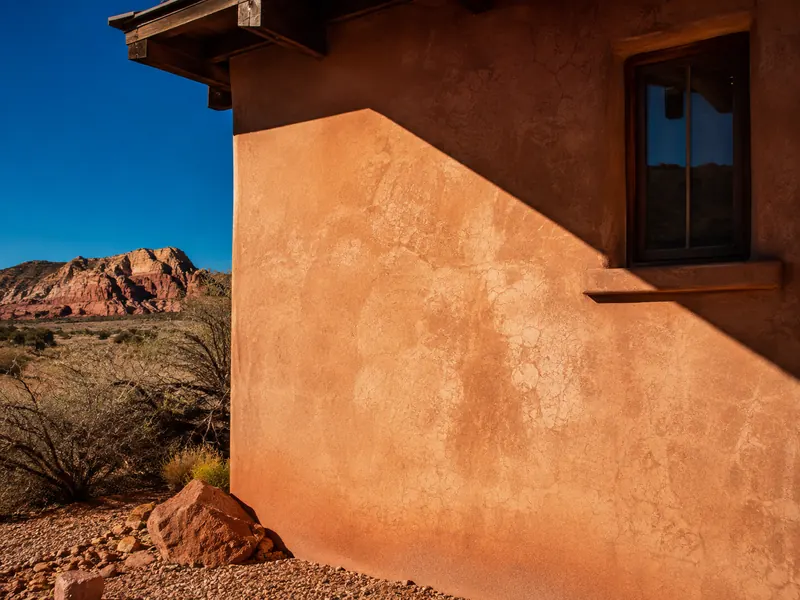
Stucco Resurfacing Across Washington County
Walls across Washington County face very different conditions depending on their elevation. Pine Valley sits near 6,500 feet and Veyo near 4,500, while the valley floor sits well below both. In the valley, the sun usually fades a wall long before anything else goes wrong, and that color loss accounts for most of the resurfacing we do. Higher communities add genuinely cold winter nights to the wear. Your property's location determines what we check when we arrive, but it never determines whether we come out.
Where St. George Elite Stucco Takes Recoating Work
St. George Elite Stucco takes recoating projects throughout Washington County. Our service area includes the connected cities around St. George, along with smaller settlements near the county's valleys and mountain approaches.
- St. George, Washington, Santa Clara, Ivins, Hurricane, La Verkin, Toquerville, and Leeds
- Winchester Hills, Diamond Valley, Dammeron Valley, Veyo, Brookside, Central, and Pine Valley
- Gunlock, Shivwits, Virgin, and Apple Valley
We provide the resurfacing level named in your estimate throughout the county. The levels stay the same wherever you live; the condition of the wall determines which one it needs.

Resurfacing and Recoating Questions
Across Washington County, the stucco resurfacing questions we hear most often concern what each treatment can accomplish and how the finished wall will look and hold up.
What can a fog coat do, and what can it not do?
A fog coat renews the color while leaving the existing texture alone. Because it is a thin wash, it has no thickness to hide a crack, reattach anything that has come loose, or change how coarse the wall feels. The color range also has limits, so a fog coat cannot lighten the wall far past the color it already has.
Does new stucco stick to old stucco?
New stucco sticks when the old surface is clean, sound, and still bonded to the material underneath. For a re-skin, we apply a bonding agent as well. Where an existing layer has let go, new material only adds more load. Before we write a number, the sounding test tells us which of those two conditions your wall has.
Why does a recoat on part of a wall still show?
Even when the formula is right, new material has not aged alongside the existing wall, so the tones differ and the join remains visible. We therefore price recoating by whole elevations and stop where the wall provides a natural break, such as a corner or joint.
If the wall gets chipped later, does the color still match?
Yes. The color runs through the coat itself, so a chip exposes the same color instead of a different material underneath. We also keep the color formula and pigment lot in your file, giving us a record to start from when you need a touch-up years later.
Will a recoat cover the cracks in my wall?
No. A recoat renews the surface, but a crack that is still moving will break through the new coat. We therefore repair the cracks first as part of our stucco repair work.
What should be itemized in a resurfacing bid before I accept it?
Before accepting a resurfacing bid, make sure it names the level for each elevation and lists the measured square footage. Preparation, repair, the coat, and the finish should each have a separate line. Ask which elevations the contractor has excluded as well. A bid covering three faces and one covering four are prices for different jobs.
Get the Level Written Into Your Estimate
Unsure which of the three levels fits your wall? A site visit gives us the answer. St. George Elite Stucco sounds each face, identifies the level it qualifies for, and sends you the result in writing, with a separate line for every elevation. Photos help us prepare for the visit, so attach any you have to the form. The visit is free, and you receive the estimate in writing. Call (435) 236-2699 or request a free estimate through our quote form.