
Stucco Installation in St. George, UT | St. George Elite Stucco
St. George Elite Stucco is a licensed and insured stucco contractor that has worked on residential and commercial properties in St. George, Utah for 15 years. When a wall needs more than a patch, stucco installation gives it a complete new plaster assembly. This differs from repairing a wall that is still basically sound or plastering a house that has never had an exterior finish.
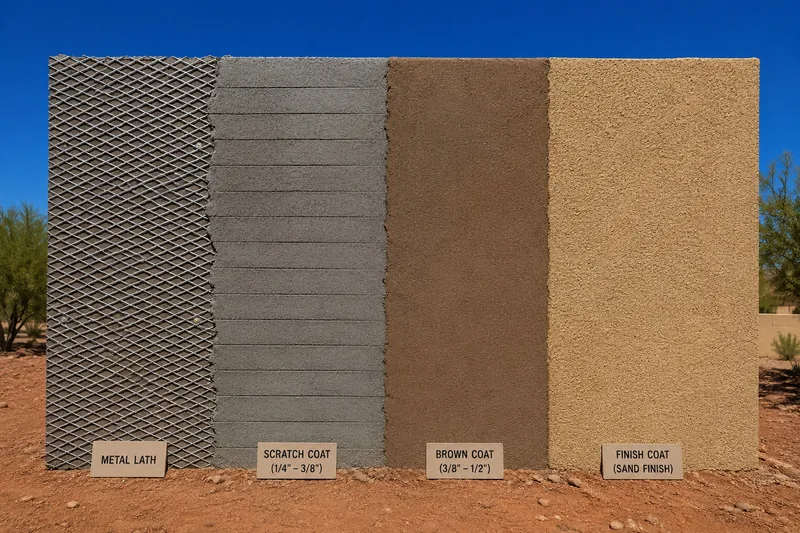
A stucco wall is built from a stack of materials rather than a single product. The first layer keeps water off the wood boards, called sheathing, that your walls are built from. This layer is the water-resistive barrier. Wire mesh, called metal lath, goes over the barrier and gives the plaster something to grip. The plaster then goes on in three coats, building to roughly seven-eighths of an inch in total. ASTM C926 and ASTM C1063 are the two industry standards that set out how the plaster and the mesh beneath it are meant to be installed.
On an existing house, the windows, doors and roof edges are already in place, and each one must be built back into the new wall instead of simply being plastered up against. Nobody can tell you what is behind the old exterior finish until it comes off. St. George brings another complication because plaster hardens by taking up water, while the town receives under nine inches of rain a year. The wall therefore has to wait on purpose while the plaster hardens.
If your walls are due for a new assembly, you can arrange for us to inspect them. We install stucco throughout Washington County, including St. George, Santa Clara, Hurricane, Ivins and the smaller communities beyond them.
Request a Free Estimate
We're ready to take on your project!
Stucco Installation on an Existing Building
Leaving part of the old wall in place could hide problems behind the new finish. Yes, we take the old finish off as part of the job, and removal appears as its own line on your estimate because it requires separate labor and disposal. A wall going up with no previous exterior finish is new construction work rather than an installation.
Re-Cladding a Wall That Has Something Else On It
Once the old exterior finish comes off, you may see bare sheathing and considerable daylight through the eaves on the first day. That is normal. Because nobody can verify what is behind the old finish until the wall is open, we inspect the sheathing for rot and water staining and confirm that the fasteners land in the framing. Any damaged board is replaced at this stage instead of being covered. We also check that the wall is square and true because the new plaster will follow the surface beneath it.
Living in the House While the Walls Are Open
Most people can stay in the house throughout the installation. Each elevation is fully open for only a day or two, and the water-resistive barrier goes on the same day the sheathing is exposed, so bare board is never left facing the weather overnight. If rain is forecast, we will not open a wall we cannot close. Your windows and doors remain usable, although we mask them while the coats go on. Exterior fixtures are pulled clear and reset rather than plastered around, including hose bibs, gas meters, exterior lights and air conditioning line sets. Before work begins, we walk you through which fixtures will be affected.
Additions, Casitas, and Walls Being Matched to a House
When an addition or casita sits directly beside a wall finished years earlier, the new elevation needs to work alongside the existing one without pulling it apart. The new wall receives its own complete assembly and a control joint where the two walls meet, allowing movement at that connection. Its finish texture also needs to blend with what is already there. We judge the match on your wall in daylight, where it will actually be seen, rather than relying on a sample viewed in the truck. Matching a patch into an otherwise sound wall is repair work and belongs to that service.
Which System Goes on the Wall
The right system for your retrofit depends on the existing wall and the windows and doors already set into it. Those conditions determine whether the wall suits a traditional three-coat assembly, sometimes called hard coat stucco, or an engineered one-coat base. The decision comes down to the weight and thickness the wall can carry and how far the new finish will stand out from the existing openings. A thicker assembly changes the shadow line around each window, known as the reveal, so we work through that with you first. The one-coat specification belongs to our new construction work, while our commercial page covers EIFS, or synthetic stucco, which is a different wall system rather than a texture choice.
The Assembly Behind the Finish
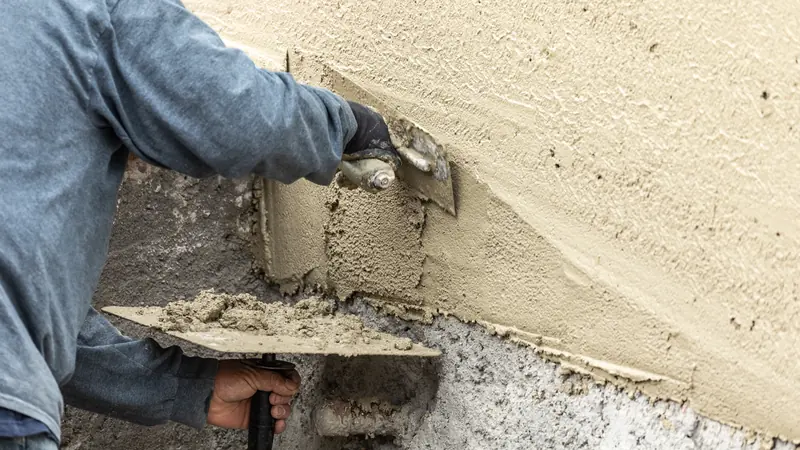
A finished wall may look complete even when a skipped layer underneath leaves it vulnerable to failure. Although the finish coat is the only part you see, the product you are buying is the complete wall assembly beneath it. Every layer must work with the next because the wall can fail wherever a required part is missing. The assembly also sets your price, which is why our estimate names the system before it names a number.
Drainage Planes Over Wood Sheathing
Any water that gets past the stucco needs a clear way to leave the wall before it can reach the wood sheathing. The code’s baseline over wood sheathing is two separate, continuous layers of water-resistive paper behind the plaster, with each layer serving as a complete barrier in its own right. Two sheets lapped together to create what is really one layer do not count. A heavier single layer is also permitted in the right build-up, so the specification follows the wall in front of us. Each layer overlaps downward to shed water, and anything passing through the wall is tied into the barrier rather than simply taped over it.
Lath Held Off the Wall, Not Flat Against It
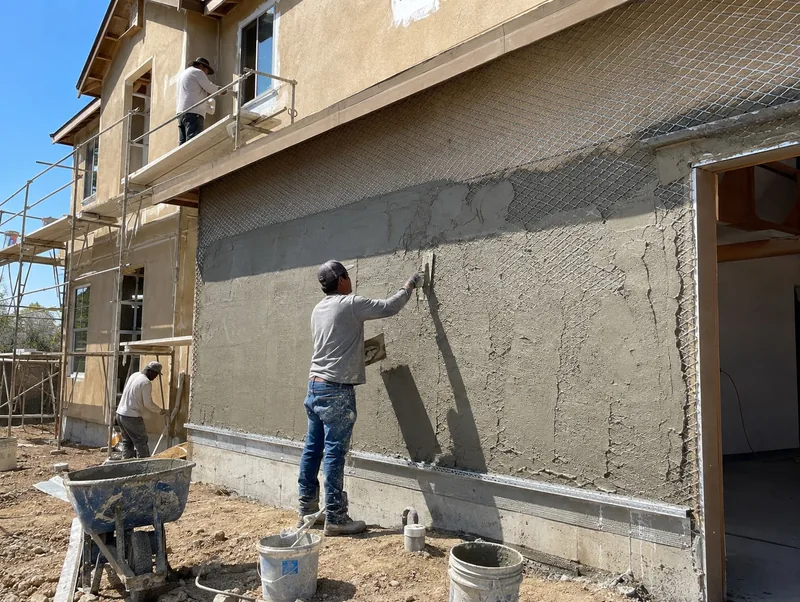
For the plaster to remain attached to your wall, it needs a firm mechanical grip on the metal lath. Self-furring dimples hold the lath about 1/4 inch away from the substrate, allowing the scratch coat to close around the mesh from both faces. If the plaster touches only the front of the lath, nothing grips it from behind. We fasten the lath into the framing rather than the sheathing alone and use corrosion-resistant metal because it remains inside a damp cement layer. At the bottom of the wall, a weep screed gives water from the drainage plane a place to exit. This stage is inspected before any plaster covers it.
Three Coats and the Purpose of Each
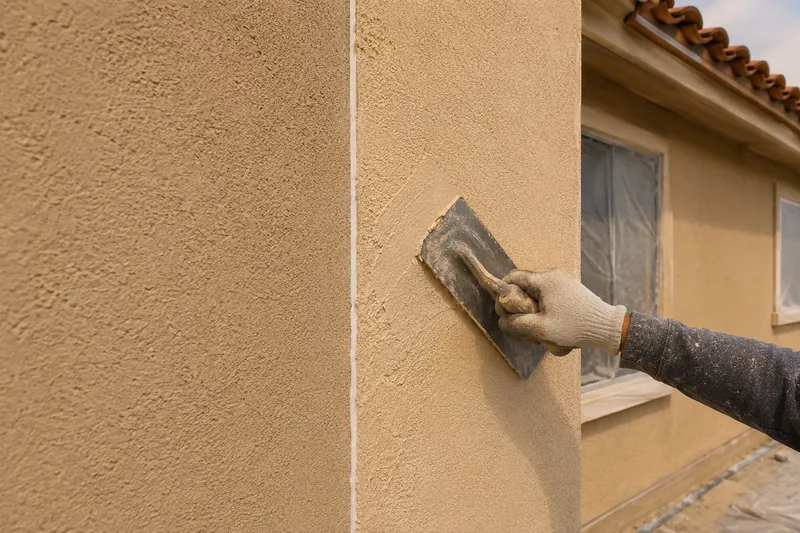
The color and texture you choose come from the outer coat, but the two coats underneath provide the bond, thickness and flat surface that the finish depends on. Traditional stucco uses three different mixes because each coat has a separate job. The scratch coat is applied at a nominal 3/8 inch and scored across its face, giving the coat its name and creating a surface for the next layer to grip. The brown coat adds another nominal 3/8 inch and determines whether the wall is flat. The finish coat is a nominal 1/8 inch and gives your selected color and texture.
On a framed wall with a metal plaster base, the three coats create a nominal 7/8-inch build measured from the face of the support. The code sets 7/8 inch as the exterior minimum for that assembly. Masonry walls use different thicknesses, which our block wall work covers.
Trim, Joints, and the Openings That Are Already There
Openings and rooflines are the places where water is most likely to enter a retrofitted wall, so the details around them matter to the life and appearance of the finished work. At each opening, the head flashing must connect with the drainage plane behind the plaster rather than simply resting on the finished surface. Where a roof meets a wall, kickout flashing at the bottom of the run directs water into the gutter instead of letting it travel down inside the wall. Careful detailing also helps each opening blend cleanly into the finished elevation, while poor detailing can remain visible for the life of the building.
Before we mix plaster for a stucco installation, the metal trim that shapes and terminates the wall has to be in place. The required pieces include the following.
- Where the plaster meets a window, door or soffit, casing bead creates a clean termination and helps the edge hold a straight line.
- At the outside edge where two wall planes meet, corner aid keeps the corner straight and true, which is especially important because that edge is one of the first things you notice.
- Because cement plaster will move, control joints create planned breaks that determine where the movement occurs.
- At the base of the wall, weep screed terminates the assembly and gives water in the drainage plane a way out. It sits at least 4 inches above bare earth, or at least 2 inches above a patio or path.
Because the trim and joint locations remain visible across the finished wall, their layout needs to be decided before anything is fastened. We plan joint spacing around the panel and agree on the trim layout with you before installation begins. The trim manages water while also establishing the lines of the finished elevation. When an existing wall has a short weep screed and its clearance needs to be reset, that work is remediation rather than part of a new installation.
Curing a Cement Wall in a Desert
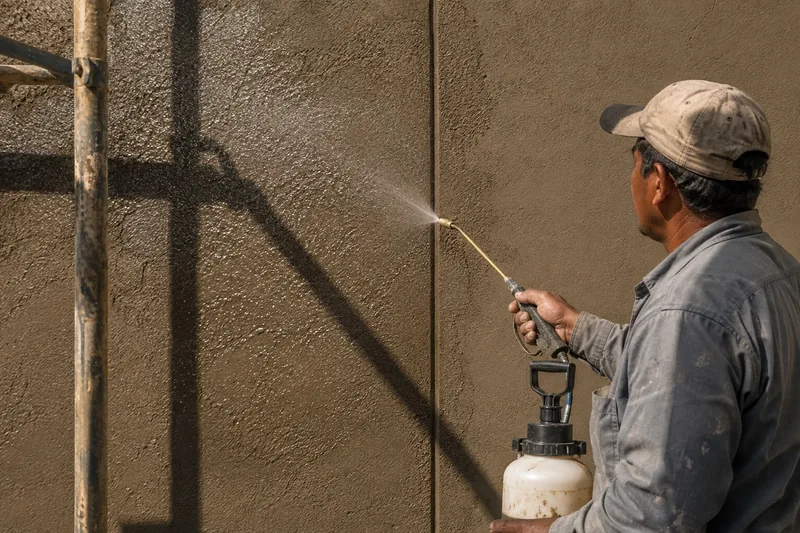
Cement plaster does not simply dry out. It sets through a chemical reaction that needs both time and moisture, while the desert heat can pull that moisture away faster than the cement can use it. The curing schedule is written into the plan before work begins rather than decided on the scaffold.
The Schedule the Code Sets
You may see us return on days when the wall looks unchanged because maintaining the right moisture level is part of the work. The second coat is applied not less than 48 hours after the first, and the interval begins when the first coat was placed rather than when the crew left. The finish coat then waits not less than 7 days after the second coat. Each coat is kept moist for at least 48 hours while it cures, which requires dampening the wall without soaking it.
Why the Desert Makes Curing Harder
Curing fresh plaster in Southern Utah means working through around 255 sunny days a year and 50 to 60 days above 100 degrees. Low humidity draws water from a fresh coat faster than the cement can take it up, while wind can remove as much moisture as the heat. To keep your wall from losing moisture too quickly, we schedule application away from the worst afternoon heat and work on shaded elevations while the sun is on the others. Where an elevation has no shade of its own, we hang shade cloth over the fresh work.
What Curing Costs You in Water
Keeping a wall damp in a drought town is a reasonable thing to ask about. Damp curing uses a mist rather than a running hose, so a single-story elevation takes a few gallons per application where a lawn takes hundreds. Across a whole house, the total is comparable to a couple of ordinary irrigation cycles.
Unless you would rather have us bring water, we draw from your exterior hose bib and tell you which days the wall will need it. Washington County's outdoor watering rules govern landscape irrigation rather than construction curing, but your HOA may run its own schedule. If it does, tell us and we will work inside it.
Why Choose St. George Elite Stucco for Stucco Installation
A finished wall does not show whether it was built to full thickness or given the full cure schedule. Both are written into our estimate before any work starts, so you can see what you are buying without having to take it on trust.
Built to the Standard and the Full Schedule
You should be able to see the system, thickness and schedule before committing to the work. We price full thickness and the complete cure schedule into the job, including the days when the wall waits on purpose. Before a bag of plaster is opened, the lath layer and the rest of the metal are installed to standard. Three-coat, engineered one-coat and EIFS are handled as separate systems, and we specify whichever one the building calls for.
Credentials You Can Check Before We Start
Before we work on your wall, you can verify our license and insurance coverage. We carry general liability and workers' compensation. Certificates are available before work starts, and our license number goes on every written estimate. Utah's Division of Professional Licensing maintains a public license lookup, so you can use that number to confirm the license yourself. Because a certificate shows that coverage was in force on the day it was issued, ask for it before the scaffold arrives. To book a stucco installation walkthrough in St. George or Washington County, call (435) 236-2699 or use the quote form.
What Drives the Price of a Stucco Installation
When you are budgeting for stucco installation, the assembly chosen for your wall will determine most of the stucco installation cost. We settle the system before preparing a quote because the finish material moves the number far less than the assembly beneath it. Other factors that affect the price in St. George and across Washington County include the following.
- Wall area and story height. Upper walls can add cost even when they do not add much square footage because the crew still needs a safe way to reach them. Scaffold or lift time must be priced whether or not the second-story wall is large.
- Openings and corners. A wall with many windows costs more per square foot than a blank wall because every opening requires its own trim, termination and flashing work.
- Substrate condition. The finished wall hides the condition of your sheathing, so no one can assess it until the work is open. Instead of guessing, we include possible sheathing work as a contingency line.
- The cure schedule. Those days count on the calendar, and keeping the scaffold standing during that time adds to the price.
- Access and staging. The amount of working room around your house changes how the crew can set up. A tight lot with a block wall three feet from the elevation requires a different setup than a house with a driveway where equipment and materials can be staged.
A per-square-foot rate given over the phone would be a guess because no one has seen your openings, access or wall conditions. After the walkthrough, you receive our scope in writing so you can compare it with another bid on the same terms. For an on-site inspection, call (435) 236-2699 or use our quote form.
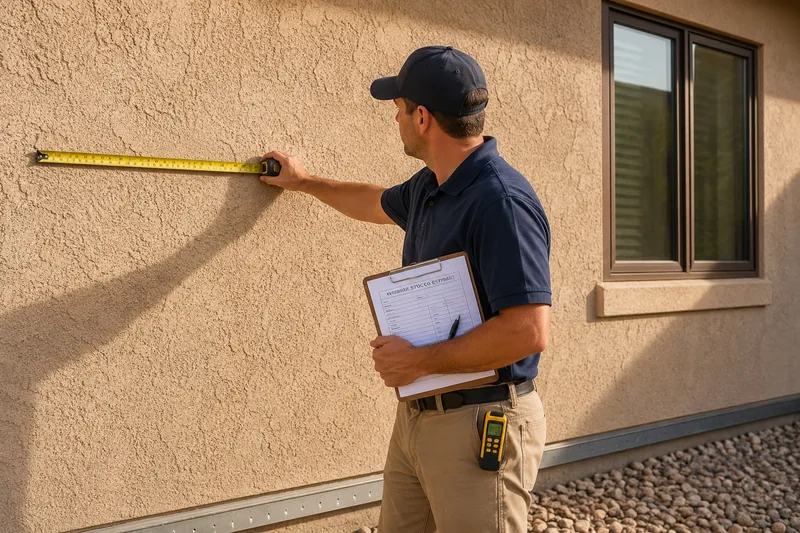
How a Stucco Installation Runs, Start to Finish
A St. George Elite Stucco installation follows five steps, beginning with the first walkthrough and ending with your final review of the finished elevations.
-
Walkthrough and written estimate.
Before you agree to the work, we walk each elevation with you, take measurements and assess the existing exterior. You then receive a written scope with the price attached, and the walkthrough itself is free.
-
Permits and HOA approval.
Required approvals need to be settled before installation can begin. We verify the jurisdiction and handle required permit applications. When your community reviews exterior changes, we provide the product color and texture samples needed for the submittal.
-
Barrier, lath, and trim.
Once the approvals are in place, you will see the wall assembly take shape. The drainage planes go on first, followed by the metal lath and every accessory that terminates or divides the wall. We check the barrier, lath and accessories at this stage before the work continues.
-
Scratch, brown, and the cure between them.
The wall will wait between coats even when it may appear ready for the next step. After the scratch coat goes on, it receives the time it needs before the brown coat brings the wall to a true plane.
-
Finish, final walkthrough, and cleanup.
Your chosen color and texture appear in the finish coat. Before the scaffold comes down, we walk every elevation with you so you can review the finished work, and then we clear the site.
To put your walkthrough on the calendar, call (435) 236-2699 or send your details through the quote form.
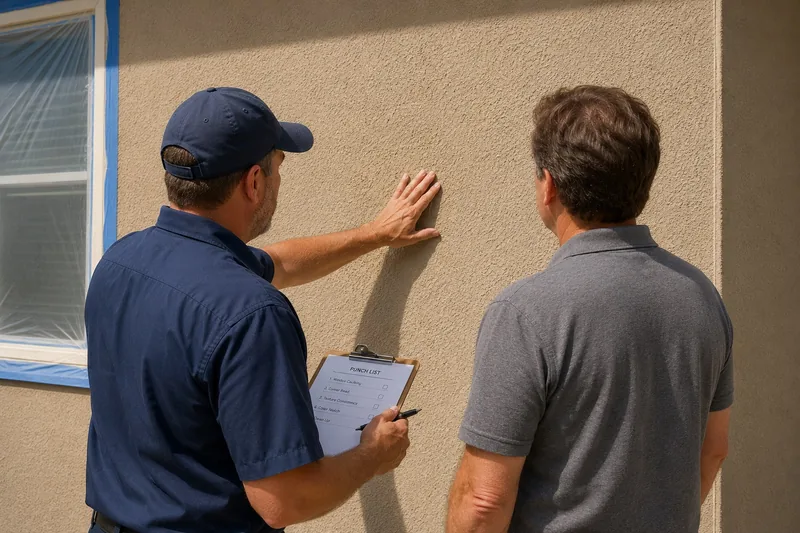
Standards and Code Behind a Stucco Installation
The standards behind your installation give you something concrete to compare with the written scope and the work you see on the wall. Two standards govern most of that work, and both address construction rather than appearance. ASTM C926 sets out how portland cement plaster is applied, while ASTM C1063 sets out how the lath and its furring are installed beneath it. Together, they establish the requirements for thicknesses, fastening, furring and curing.
Where your contractor is based determines the required business license, but Utah adopts its building codes statewide rather than city by city. The edition currently in force is set out by the Utah State Legislature (). Utah also licenses contractors at the state level. A state contractor license plus a business license in the contractor's principal place of business are the only licenses required, and cities and counties are not permitted to add their own on top.
A fire-resistance claim matters because it applies only when the wall matches the assembly that was tested. The precise requirements are as follows.
- A one-hour fire-resistance rating belongs to a specific tested assembly, meaning the exact layers, materials and attachments that were tested together. It is not a property of stucco as a material.
- Substituting any layer places the wall outside the tested configuration, so a wall built differently does not carry the rating.
- ASTM E119 is the test method that produces those ratings. ASTM C1063 states that the rating comes from reports of fire tests of assemblies rather than from the lathing standard itself.
- When a contractor tells you a wall will be one-hour rated, ask which listed assembly they are building to. That is a fair question with a specific answer.
Before work starts, you can reasonably ask to see the certificate of insurance and a written scope that names the system.
Stucco Installation Across Washington County
Wherever your property is in Washington County, its access, wind exposure and afternoon sun can affect how the installation is planned. A wall in Hurricane cures on the same schedule as one in Ivins, so the assembly logic barely changes across the county. During the walkthrough, we account for how much afternoon sun each elevation takes along with the access and wind exposure.
Where St. George Elite Stucco Works
Your location should make it easy to determine whether your property falls within the service area. St. George Elite Stucco serves communities throughout Washington County, from the connected cities around St. George to smaller settlements near the county's valleys and mountain approaches.
- St. George, Washington, Santa Clara, Ivins, Hurricane, La Verkin, Toquerville, and Leeds
- Winchester Hills, Diamond Valley, Dammeron Valley, Veyo, Brookside, Central, and Pine Valley
- Gunlock, Shivwits, Virgin, and Apple Valley

Installation Questions Homeowners Ask
How long will the whole job take?
If you are planning around a typical single-family re-clad, allow four to six weeks from the first day of removal until the scaffold comes down. Most of that time is not spent plastering. Weather and elevation count affect the rest of the schedule, while a house with many openings takes longer than one with large blank walls.
Will a new stucco wall crack?
Fine hairline cracks in the finish coat are normal in this climate and do not mean the wall has failed. As the wall moves, control joints direct where it relieves that movement, keeping it along a planned line instead of across the middle of an elevation. A crack that opens wide enough to admit water, or returns in the same place after a repair, points to a different problem that belongs with our remediation work.
What time of year is best for stucco work in St. George?
Spring and autumn are the easiest seasons for stucco work because moderate temperatures make curing more straightforward. Summer work is entirely normal in St. George, but crews need to start earlier, work on shaded elevations through the afternoon and pay closer attention to keeping the coats damp. Hard winter frost is the main seasonal constraint, although it is rare enough locally that it seldom changes a schedule.
Does stucco give my house a one-hour fire rating?
No, stucco does not give your house that rating on its own. The rating is a property of a tested assembly rather than of the material, so substituting any layer puts your wall outside what was actually tested. Stucco is fire-resistant within an approved assembly, and that qualification matters. If a rating matters for your project, ask which listed assembly the contractor plans to build.
Can a handyman install stucco?
Before the scaffold goes up, ask whoever you hire to show you their licensing and coverage on paper; ours is available for the asking. Utah issues contractor licenses at the state level, so cities and counties cannot add their own requirements on top. A state contractor license plus one business license are the only two required anywhere in Utah.
How can I check my own wall before we quote it?
Before we quote the work, you can make a quick check at the base of an exterior wall. Find the metal strip where the stucco stops and look for a clear gap beneath it, with four inches of daylight over soil or two over concrete. If landscaping or a poured path has buried that strip, water has no way out of the wall, so mention it when you call. Correcting a buried screed on an otherwise sound wall is remediation rather than an installation.
Have Your Walls Assessed for a New Assembly
We walk each elevation, assess the walls and put our findings in writing so you can make that decision with clear information. Bring elevation photos if you have them. The visit is free, and you receive the estimate in writing. Call (435) 236-2699 or request a free estimate through our quote form.